This easy raspberry jam recipe turns fresh or frozen berries into a bright, spoonable homemade spread. It uses four simple ingredients, requires no added pectin, and makes a manageable small batch for the refrigerator or freezer.
Quick Answer: Combine 4 cups of raspberries with 2 cups of granulated sugar, 1 tablespoon of lemon juice, and an optional pinch of salt. Rest the mixture for 10 minutes, then cook it until thick and glossy. Use a chilled plate to test the set before transferring the jam to clean containers.
Important: This is a refrigerator or freezer jam. Filling a clean jar does not make it shelf-stable, and this article does not provide a water-bath canning process.
Why You’ll Love This Raspberry Jam
- No added pectin: The fruit, sugar, lemon juice, and cooking process create the spreadable consistency.
- Small-batch friendly: The recipe makes about 2 1/2 cups, so you do not need a large preserving setup.
- Fresh or frozen fruit: Unsweetened frozen raspberries work well when fresh berries are unavailable.
- Simple doneness test: A chilled plate helps you check the consistency without special equipment.
- Plenty of uses: Spread it on toast, spoon it over pancakes, or use it as a filling for suitable baked goods.
This recipe is made without added pectin. The phrase “no added pectin” is more accurate than “pectin-free” because raspberries naturally contain pectin.
Ingredients for Homemade Raspberry Jam
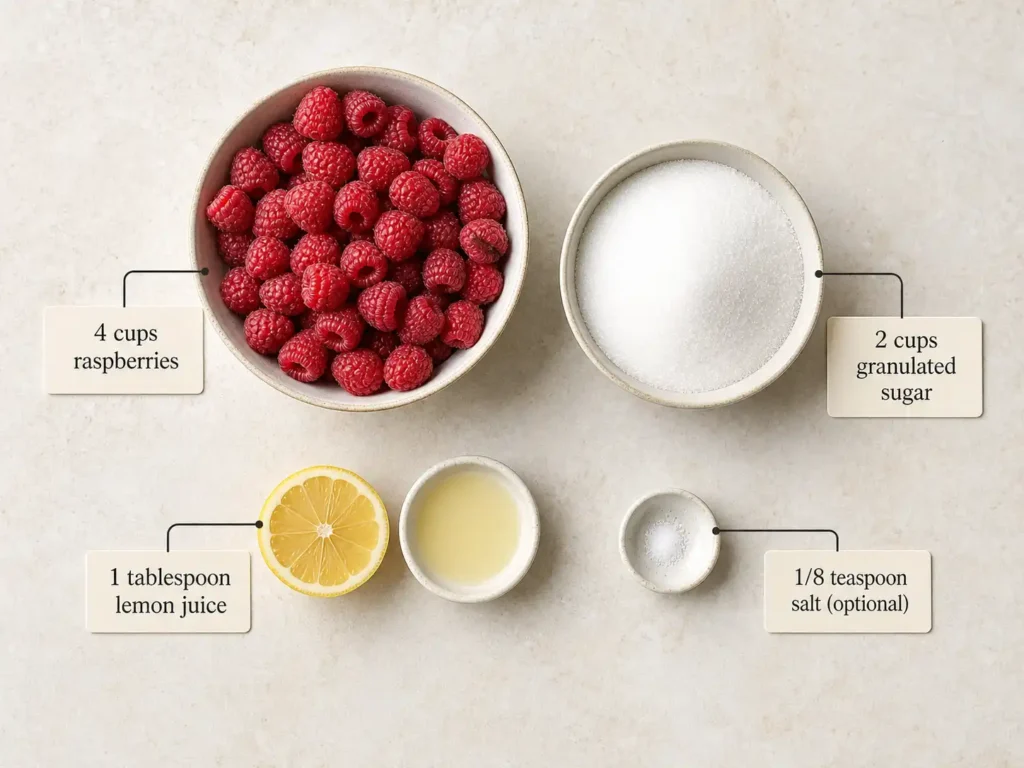
- 4 cups fresh or frozen unsweetened raspberries: This is about four 6-ounce containers of fresh berries. If using frozen fruit, thaw it and keep all the released juice.
- 2 cups granulated sugar: Sugar sweetens the tart berries and helps the jam reach its spreadable consistency. Do not reduce it casually, since a major change can affect the set and storage quality.
- 1 tablespoon fresh lemon juice: Lemon brightens the raspberry flavor and adds acidity.
- 1/8 teaspoon table salt, optional: A small pinch can balance the sweetness without making the jam taste salty.
Fresh vs. Frozen Raspberries
Both fresh and frozen unsweetened raspberries can be used. The most important point is to measure the correct quantity and retain the juice released by frozen fruit as it thaws.
| Option | Preparation | What to Watch |
|---|---|---|
| Fresh raspberries | Sort the berries, rinse them gently, and drain well. | Remove any moldy, leaking, or badly damaged berries. |
| Frozen raspberries | Thaw in a bowl and add the berries with all their juice. | Use unsweetened fruit. Do not drain away the thawed juice. |
Frozen berries may take a little longer to come to a full boil if they are still cold. Use the consistency test, rather than the clock alone, to decide when the jam is ready.
How to Make Raspberry Jam
1. Chill a Small Plate
Place a small heat-safe plate in the freezer before you begin. You will use it to test the jam near the end of cooking.
2. Combine and Rest the Ingredients
Place the raspberries, sugar, lemon juice, and optional salt in a wide, heavy-bottomed saucepan. Mash some of the berries with a potato masher or sturdy fork, leaving a few small pieces for texture.
Stir well and let the mixture stand for 10 minutes. This short rest allows the berries to release juice and gives the sugar a chance to begin dissolving.
3. Cook the Jam
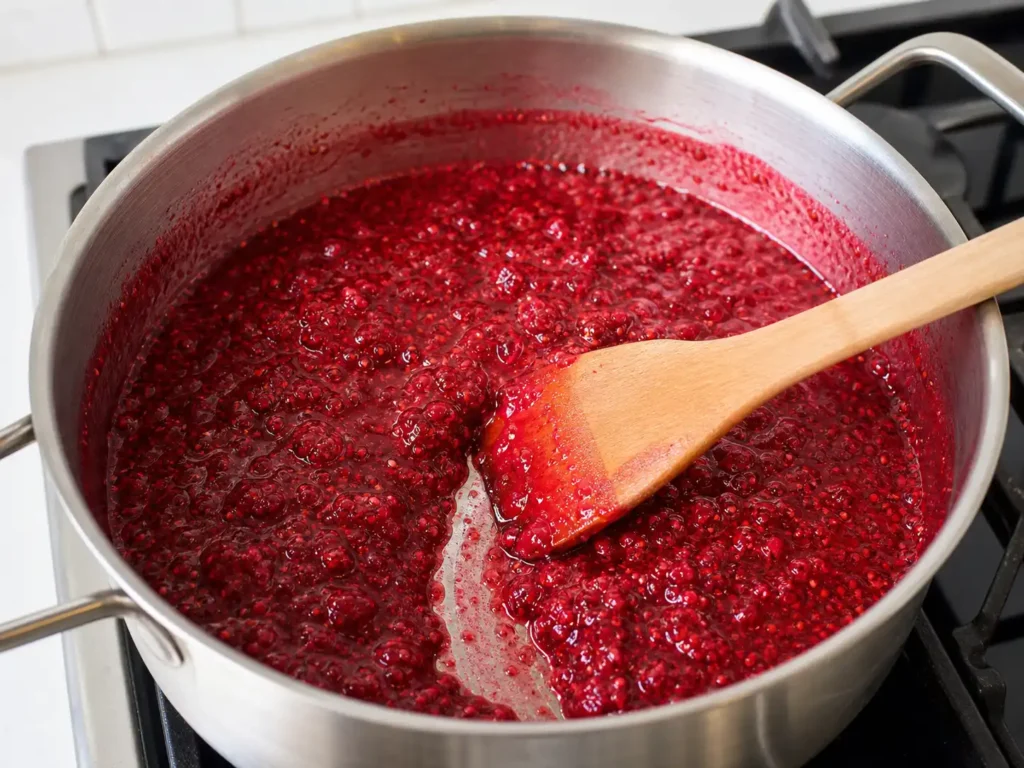
Set the saucepan over medium-high heat and bring the mixture to a full boil, stirring frequently. Once it boils, reduce the heat to medium.
Continue cooking for about 20 to 25 minutes. Stir frequently and scrape across the bottom of the pan to prevent scorching. The bubbles will become slower and heavier as the mixture reduces.
Because the jam expands and bubbles as it cooks, do not leave the pan unattended. If it threatens to boil over, reduce the heat immediately.
4. Test for Doneness
Remove the chilled plate from the freezer and place a small spoonful of jam on it. Return the plate to the freezer for 1 to 2 minutes.
Push the cooled jam gently with a finger or spoon. It is ready when the surface wrinkles slightly and the path through the jam does not immediately fill with liquid.
If it still runs quickly, cook the jam for another 2 to 3 minutes and test again. Remove the saucepan from the heat while testing so the rest of the batch does not overcook.
5. Cool and Transfer
Remove the finished jam from the heat. Skim off excess foam with a clean spoon if desired, then let the jam stand for about 5 minutes.
Carefully transfer it to clean, heat-safe jars or containers. Let the containers cool before covering and refrigerating them. The jam will continue to thicken as it cools.
How to Tell When Raspberry Jam Is Done
Hot jam always looks thinner than cooled jam, so appearance in the saucepan is not enough. Look for several clues together:
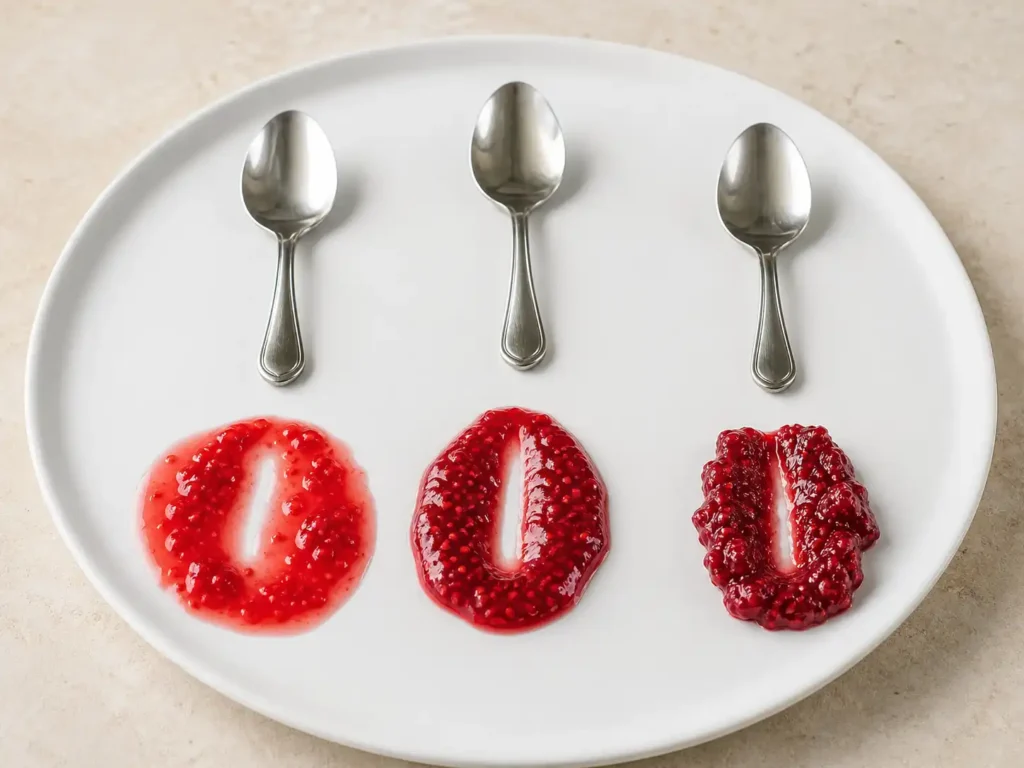
- The bubbles look thicker and rise more slowly.
- The jam coats the back of a spoon instead of running off like juice.
- A spoon drawn through the jam briefly leaves a visible path.
- A chilled sample moves slowly and wrinkles slightly when pushed.
Stop cooking once the chilled sample is softly set. Waiting for the entire hot batch to look as thick as refrigerated jam can lead to an overly stiff result.
How to Make Raspberry Jam With Fewer Seeds
For a smoother texture, mash the raspberries and warm them just until juicy before adding the sugar. Press part or all of the softened fruit through a fine-mesh sieve, then measure the strained fruit and juice before continuing.
Seed removal reduces the amount of fruit mixture and may change the yield and cooking behavior. For the most predictable result, remove only part of the seeds while keeping the original amount of prepared fruit used in the recipe.
Press the soft pulp through the sieve gently. Stop when mostly dry seeds remain instead of forcing gritty seed fragments into the fruit.
Raspberry Jam Troubleshooting
| Problem | Likely Cause | What to Do |
|---|---|---|
| The jam is too runny | It was undercooked, tested while too warm, or has not cooled completely. | Chill it fully before judging. If it remains loose, use it as a sauce or return it to the pan and cook briefly while repeating the cold plate test. |
| The jam is too thick | It cooked too long or was judged only while hot. | For immediate refrigerator use, warm the amount you need with a few drops of hot water until spreadable. |
| There is foam on top | Air became trapped while the fruit boiled. | Skim the foam with a clean spoon after removing the pan from the heat. |
| Sugar crystals appear | Undissolved sugar remained on the sides of the pan or the mixture was stirred after it became very concentrated. | Dissolve the sugar thoroughly early in cooking and avoid scraping dried crystals from the sides into the jam. |
| The jam tastes scorched | The heat was too high or the bottom was not stirred often enough. | Do not scrape burned material into the finished jam. A strongly scorched batch is best discarded. |
Helpful Tools for This Recipe
No specialized canning equipment is needed for this refrigerator jam. These basic tools make the process easier:
- Wide, heavy-bottomed saucepan: Provides room for bubbling and encourages even reduction.
- Heat-safe spoon or spatula: Helps scrape the bottom and corners of the pan.
- Potato masher: Breaks down the berries while allowing control over the final texture.
- Fine-mesh sieve: Useful if you want to remove some of the seeds.
- Small plate: Provides a simple way to test the set.
- Clean heat-safe jars: Suitable for cooling and refrigerator storage.
- Freezer-safe containers: Necessary if you plan to freeze part of the batch.
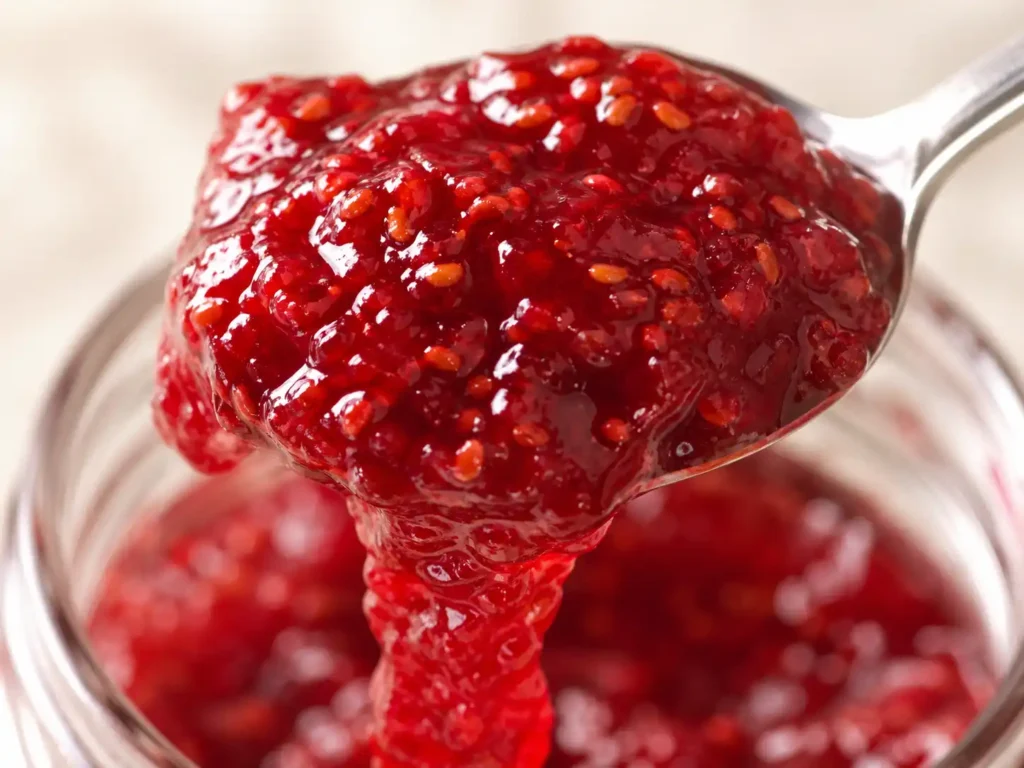
Ways to Use Homemade Raspberry Jam
This jam is useful far beyond plain toast. Try it:
- On a warm pancake recipe from scratch.
- With Greek yogurt pancakes.
- Swirled into plain yogurt or oatmeal.
- Spooned over waffles, biscuits, or scones.
- As a thin layer in cakes or sandwich cookies.
- As a filling for homemade pop tarts, provided the jam is cooked to a thick consistency.
- Warmed gently and used as a dessert topping.
Storage and Food Safety
Let the jam cool, cover it, and store it in the refrigerator. Refrigerator and freezer jams generally keep for up to three weeks under refrigeration or up to one year when frozen, according to guidance from the National Center for Home Food Preservation.
For freezing, use freezer-safe containers and leave about 1/2 inch of empty space at the top to allow for expansion. Thaw frozen jam in the refrigerator.
Always use a clean utensil to remove jam from the container. Discard the entire container if you notice mold, unusual fermentation, bubbling unrelated to stirring, or an abnormal odor. Do not scrape away mold and eat the remaining jam.
This recipe is not shelf-stable. Do not store it in a pantry or at room temperature. For shelf-stable preservation, select a tested canning formula and follow its ingredient quantities, jar preparation, processing time, and altitude adjustments exactly. See the National Center for Home Food Preservation guide to making jam without added pectin.
Nutrition Notes
A serving is 1 tablespoon. Based on 40 servings, each serving contains approximately 45 calories, 12 grams of carbohydrate, 11 grams of sugar, and less than 1 gram each of fiber, protein, and fat.
Nutrition is estimated, not guaranteed. Actual values vary with the fruit, ingredient measurements, final yield, and serving size. These estimates are not medical or dietary advice.
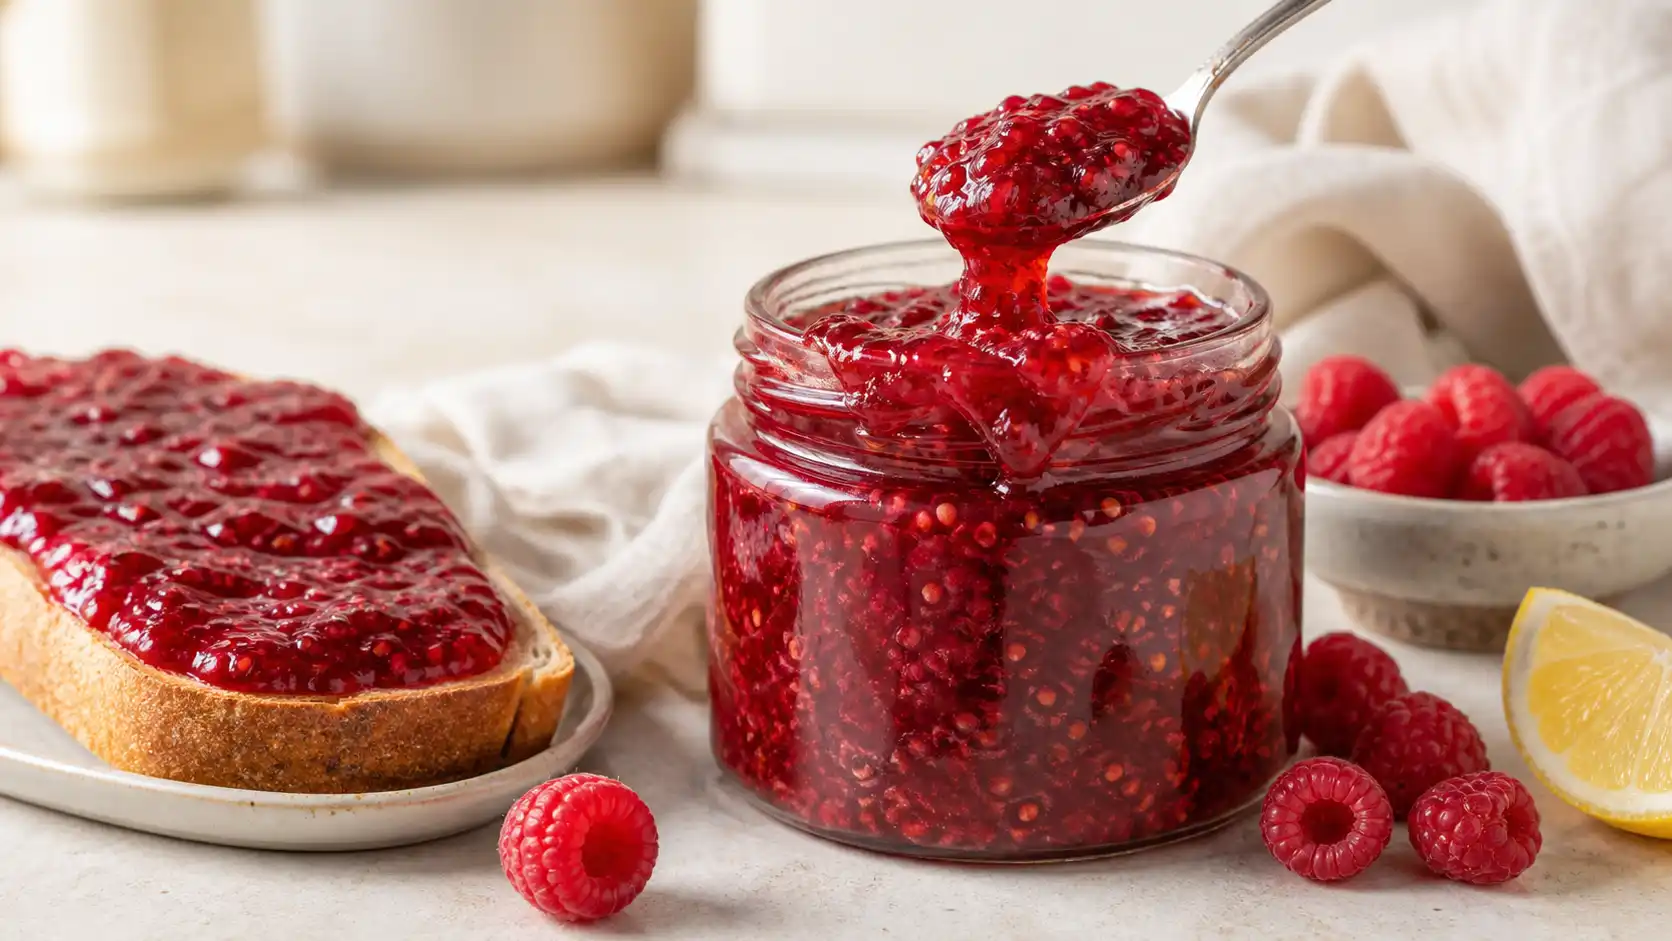
Easy Raspberry Jam Recipe (No Added Pectin)
Ingredients
Equipment
Method
- Place a small heat-safe plate in the freezer. It will be used later to test whether the jam has set.
- Add the raspberries, granulated sugar, lemon juice, and optional salt to a wide, heavy-bottomed saucepan.
- Mash some of the raspberries with a potato masher or sturdy fork, leaving a few small pieces for texture. Stir thoroughly and let the mixture rest for 10 minutes so the berries release their juice and the sugar begins to dissolve.
- Place the saucepan over medium-high heat. Bring the mixture to a full boil while stirring frequently.
- Reduce the heat to medium and cook for 20 to 25 minutes. Stir frequently and scrape across the bottom and corners of the pan to prevent scorching. Reduce the heat further if the jam threatens to boil over.
- Remove the saucepan from the heat. Spoon a small amount of jam onto the chilled plate, then return the plate to the freezer for 1 to 2 minutes.
- Push the cooled jam gently with a finger or spoon. The jam is ready when its surface wrinkles slightly and the path does not immediately fill with liquid. If it still runs quickly, return the saucepan to the heat, cook for another 2 to 3 minutes, and repeat the test.
- Remove the finished jam from the heat. Skim away excess foam with a clean spoon if desired, then let the jam stand for 5 minutes.
- Carefully transfer the jam to clean, heat-safe jars or containers. Let it cool before covering and refrigerating. For freezer storage, use freezer-safe containers and leave about 1/2 inch of headspace for expansion.
Notes
Frequently Asked Questions
Can I make raspberry jam with frozen raspberries?
Yes. Use unsweetened frozen raspberries, thaw them in a bowl, and include all the juice they release. Begin checking the jam by consistency after it reaches a boil rather than relying only on time.
Do raspberries need added pectin for jam?
No. This formula uses no commercial pectin. The balance of raspberries, sugar, lemon juice, heat, and evaporation helps the jam develop its consistency.
Why is my raspberry jam still runny?
The jam may be warm, undercooked, or measured incorrectly. Refrigerate it before judging the final texture. If it is still too loose, use it as a raspberry sauce or cook it briefly again while repeating the chilled plate test.
Can I remove all the raspberry seeds?
You can strain softened raspberries through a fine-mesh sieve, but removing seeds and pulp reduces the yield. For a predictable batch, strain the fruit before adding the sugar and make sure you still have the required amount of prepared fruit.
Can I reduce the sugar in this recipe?
A large reduction is not recommended. Sugar affects sweetness, consistency, and storage quality. Use a recipe specifically developed for lower-sugar jam instead of changing this formula significantly.
Final Thoughts
A good raspberry jam recipe does not need a long ingredient list. Careful measuring, frequent stirring, and the chilled plate test do most of the work. Once the jam cools, you will have a bright, fruit-forward spread ready for breakfast, baking, or dessert.
For another homemade preserve, try this strawberry rhubarb jam, blackberry jam recipe, blueberry jam recipe, or peach jam recipe.