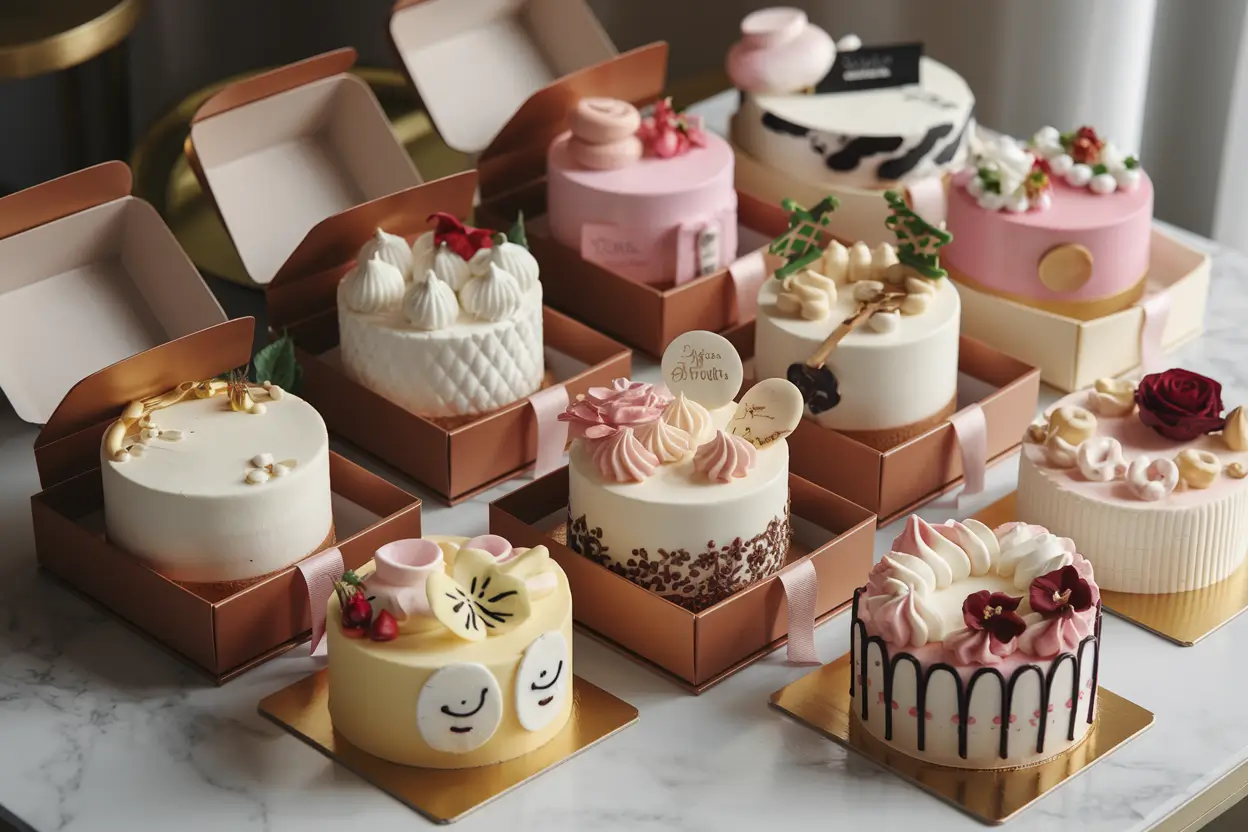
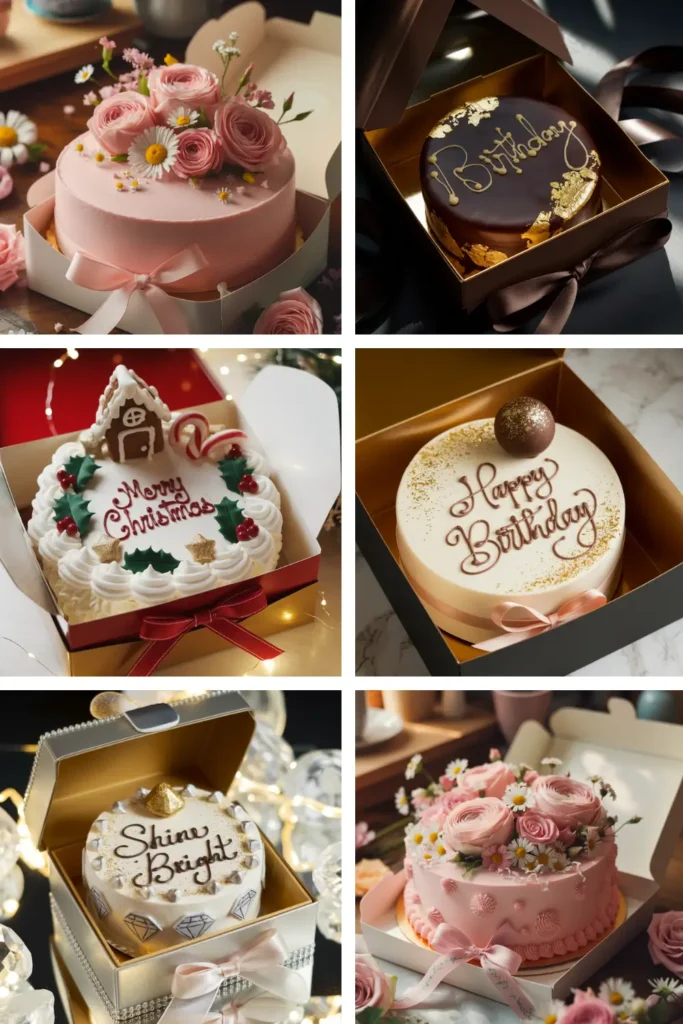
Have you ever seen this charming little cake packaged in a takeout box and wondered how to make it? Bento cake, also known as lunchbox cake, is a miniature delight that originated in South Korea and has taken the baking world by storm. In this guide, you’ll learn step-by-step how to create these adorable treats, perfect for personalized gifts or adding a touch of sweetness to any occasion.
Key Benefits: The Advantages of a Bento Cake
Bento cakes stand out for their compact size, cute presentation, and easy handling. These mini cakes satisfy a craving for something sweet without creating excess leftovers. You can share one with a friend or enjoy it alone, which makes it a good size choice for those who value portion control. Busy folks also like the fact that a small bento cake takes less time to bake and decorate compared to a full cake recipe. If you’re a home baker or a professional chef, you’ll appreciate how it’s much simpler to store, transport, and present these mini desserts.
From a creative angle, a bento cake gives you plenty of room to personalize. You can decorate it with buttercream in a trendy minimalist style, or go bold with bright gel colors. If you want extra flair, try piping fun designs around the cake with a small nozzle or topping it off with sprinkles. Since the cake layers are smaller, you can get creative with fillings—try caramel or fruit jam for new flavors in each bite. The crumb coat and final frosting are simple to manage, so it rarely feels overwhelming.
Another perk is how well a bento cake performs on social platforms. People want desserts that look pretty and photograph well, and these small treats look adorable from every angle. They’re also a popular pick for Instagram food posts, especially when placed in matching bento cake boxes. If you enjoy making short videos or step-by-step clips, you’ll find that a tutorial showing how to make a bento cake can draw attention quickly. Plus, a single batch of vanilla sponge cake batter can yield multiple mini cakes, allowing you to mix and match frostings or colors in one baking session.
Lastly, these cakes are travel-friendly. Slip them into a lunchbox, and you have a ready-to-go gift or quick dessert option. For those who prefer to weigh each gram of flour or precisely track ingredients, smaller cakes let you manage each step with ease. Whether you’re following a classic bento cake recipe or experimenting with a new twist, these mini cakes offer the perfect size for satisfying a sweet tooth without the fuss of large leftovers.
Essential Ingredients: Laying the Foundation for Bento Cake Success
Crafting a bento cake recipe starts with a few simple essentials. Below is a straightforward list of ingredients you will need to make a soft vanilla sponge cake and a smooth buttercream. Feel free to adjust flavorings or add-ons based on your personal tastes.
Flour (120g)
Choose all-purpose or cake flour. A fine-textured option creates a light crumb, which helps the cake rise evenly in a smaller tin or mold.
Granulated Sugar (100g)
Regular white sugar sweetens the batter without overshadowing vanilla or other flavorings. You can experiment with slightly less sugar if you prefer a less sweet dessert.
Eggs (2, medium-sized)
Eggs bind the batter and contribute moisture. Room-temperature eggs mix more smoothly, helping the sponge bake evenly.
Unsalted Butter (60g)
Use softened, room-temperature butter for easy creaming. If you’d rather use oil, pick a neutral variety, though butter gives that classic taste in a mini sponge. For a unique twist, try using olive oil—it adds a delicate richness and moisture, as seen in this Lemon Olive Oil Cake, which showcases how well citrus and olive oil can enhance a cake’s flavor.
Milk (60ml)
Helps thin out the batter, keeping it moist. Room-temperature milk mixes in better, preventing the butter from stiffening.
Baking Powder (1 teaspoon)
Helps the sponge rise. Make sure it’s fresh for optimal lift in your small bento cake.
Salt (a pinch)
Enhances sweetness by balancing the sugar. Even a small amount can brighten the overall flavor.
Vanilla Extract (1 teaspoon)
Vanilla gives the sponge its classic aroma. Alternatively, you can use other extracts like almond or lemon, or even fold in cocoa powder for a chocolate variation.
Buttercream Ingredients
For the frosting, gather 100g of softened unsalted butter, 200g of powdered sugar, 1–2 tablespoons of milk, and a splash of vanilla extract. If you prefer a pastel hue, add a small drop of gel color. Remember to keep the butter at room temperature to create a spreadable consistency.
Optional Add-ons
- Caramel or Fruit Filling: Spread a thin layer in the center for extra flavor.
- Sprinkles: Use these to decorate your final design.
- Fondant: Shape small accents or a topper for more detailed decoration.
- Extra Gel Colors: You can split the buttercream into separate bowls and tint them for a fun, multicolor effect.
When gathering these ingredients, weighing each one accurately is the best way to ensure a consistent outcome. A scale offers more precision than volume measurements, especially for small bento cakes. Prepare your tin or small mold—4 inches is a popular choice—to guarantee the perfect size for a personal-serving dessert. You’ll also want parchment paper or a parchment round to line the base of your tin, helping the mini cake release easily once baked. After assembling your ingredients, it’s time to move on to the instructions and learn how to bring everything together into a cute, gift-worthy treat.
How to Make a Bento Cake: Step-by-Step Guide
Follow this step-by-step tutorial to make a bento cake that looks good and tastes delicious. This method works well for a classic vanilla sponge cake, though you can easily adapt it for different flavors like caramel or cheesecake. As a baker or chef, you’ll notice it’s much faster to assemble a small bento cake than a large one, and the final result is an adorable dessert that’s a good size for one or two people. Let’s get started with the basic steps:
Prepare Your Tin and Tools
- Choose Your Pan Size: A 4-inch tin is the most common option for bento cakes. This perfect size allows the sponge to bake evenly. Some people like to use multiple cake tins if they want a few small cakes at once.
- Line with Parchment: Trace the bottom of the tin onto a piece of parchment paper, then cut it out and place it inside. This ensures the cake won’t stick when you remove it from the mold.
- Gather Your Ingredients: Check that your flour, sugar, and other items are ready to go. For the best precision, consider weighing each gram of every ingredient. A small difference matters more when you’re making a petite dessert.
- Preheat Your Oven: Set it to 160–170°C (320–340°F… Smaller cakes sometimes need a slightly lower temperature to prevent burning.
Mix the Batter
- Cream the Butter and Sugar: Using a handheld mixer, combine room-temperature butter (about 60g. with 100g sugar. Mix until the blend looks pale and fluffy.
- Incorporate Eggs: Add 2 eggs, one at a time. Use either a whisk or an electric mixer at low speed. This step helps create a light sponge structure.
- Combine Dry Ingredients: Sift 120g of flour (either all-purpose or cake flour. with 1 teaspoon of baking powder and a pinch of salt. Gradually stir these into your butter-sugar mixture to avoid lumps.
- Add Liquid: Pour in about 60ml of milk, plus 1 teaspoon of vanilla extract (this is your favorite classic flavor… Gently mix until everything blends. You want a smooth batter that’s neither too thick nor too runny.

Tip: If you want a chocolate variation, replace a small portion of flour with cocoa powder. Or for fruity twists, fold in some strawberry purée. Keep in mind that certain additions could change baking time slightly.
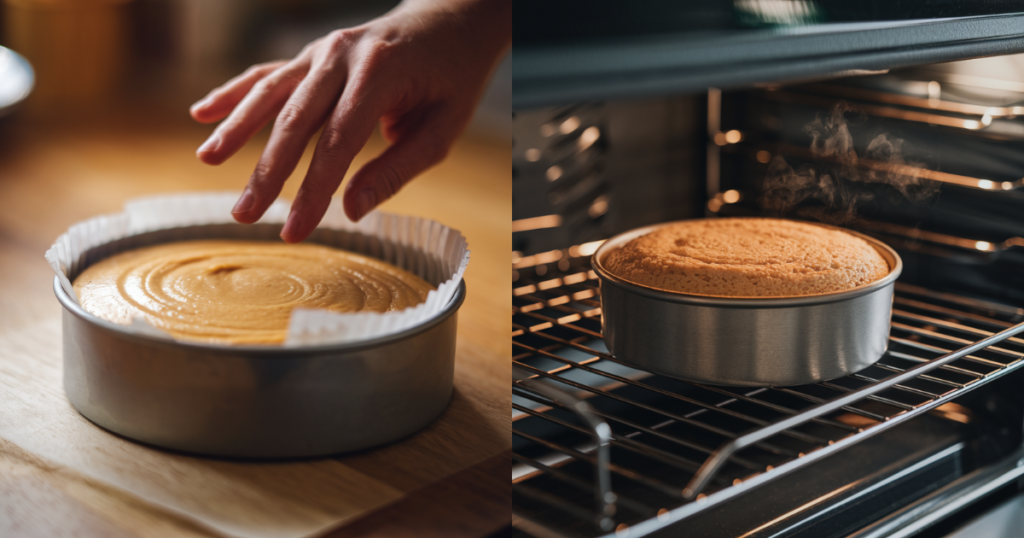
Bake Your Cake
- Fill the Tin: Spread your batter into the prepared 4-inch tin, tapping lightly on the counter to eliminate air bubbles.
- Bake: Slide it into the oven and bake for about 20–25 minutes. Keep an eye on it because small cakes can go from perfect to overbaked quickly.
- Check Doneness: Insert a toothpick in the center. If it comes out clean, your cake is ready. Let it cool in the tin for 5 minutes before carefully turning it onto a wire rack.
- Cut or Torte: Once the cake is fully cooled, slice it horizontally into 2 layers if you want to add a filling such as caramel or fruit jam. Splitting it this way also helps with layering if you plan multiple mini-cakes.
Create the Buttercream
- Gather Ingredients: You’ll need about 100g of softened butter and 200g of powdered sugar. You can add 1–2 tablespoons of milk if it feels too stiff.
- Whip the Buttercream: Using a mixer, whip everything until fluffy. This is the base icing you’ll use to crumb coat and decorate.
- Add Colour: If you’d like a pastel or bright look, stir in a drop or two of gel coloring. You can also divide the frosting into separate bowls to play with more than one color.
- Adjust Sweetness: If it’s too sweet, add a pinch of salt. Want a different taste? Mix in cocoa powder or an extract other than vanilla.
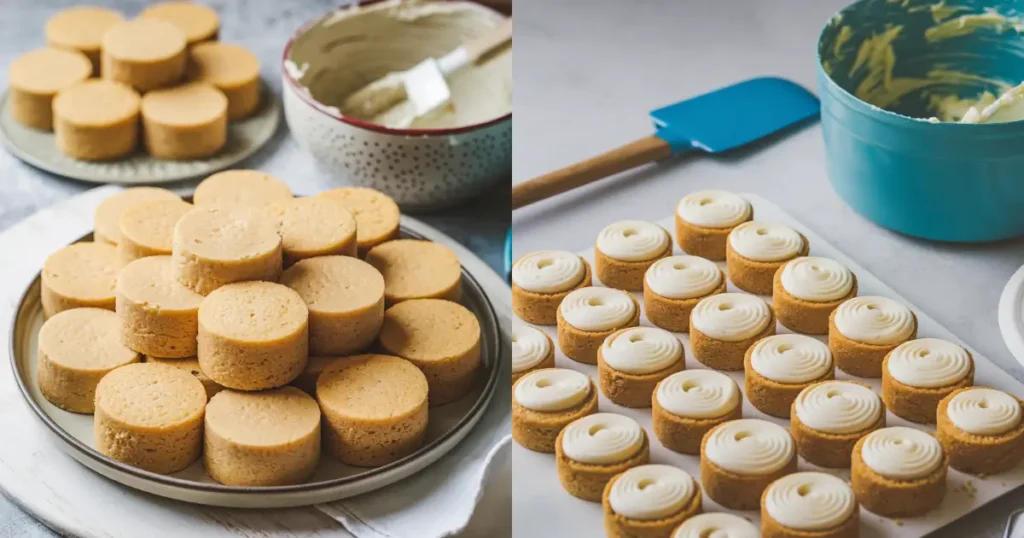
Assemble and Crumb Coat
- Layer Filling: Place the bottom half of your cooled cake on a small board or plate. Spread a thin layer of buttercream (or a surprise flavor like jam. on top. Then place the second layer over it to build your bento cake.
- Apply the Crumb Coat: Cover the entire cake with a thin layer of buttercream. This first coat traps any loose crumbs. Use an offset spatula for smoother coverage around the cake.
- Chill the Cake: Move it to the fridge for about 10–15 minutes. A short chill ensures the crumb coat sets. Once set, it’s easier to apply the final layer of frosting without dragging crumbs.
Decorate Your Bento Cake
- Second Coat: Spread the remaining buttercream all over the cake in a smooth or slightly textured finish. If you see uneven spots, you can pipe more frosting on those areas.
- Use a Piping Bag: Transfer some tinted buttercream into a piping bag fitted with a small nozzle. Pipe dots, swirls, or tiny flowers around the cake. Simple designs often look pretty on these small creations.
- Fondant or Toppers: For extra flair, add a small fondant accent or a little topper like a heart or star. A cutter can help shape these details.
- Sprinkle If You Like: Add a colorful sprinkle mix on top of your cake or along the edges. Many people want that final dusting for a more playful look.
- Candle for Special Occasions: A single candle stands out nicely on a bento cake, making it an easy gift for birthdays or mini celebrations.
Presentation and Serving
- Keep it Cool: If your kitchen is warm, you can quickly chill the finished cake for 5 more minutes to set the frosting.
- Box It Up: Slide the cake into bento cake boxes or a cute lunch box—these are widely used for bento-style cakes. This packaging makes it easy to transport and also helps your dessert look more attractive.
- Instagram Appeal: Share your creation on Instagram. It can also help to record video tutorials or short clips if you plan to show your decorating steps.
- Personalise: If you’re making this for a specific event, pipe a message or add special decorations. This is your chance to get creative and truly personalize the design.
Extra Tips and Notes
- Crumb Coat Helps: Always remember to apply a crumb coat and chill the cake. This step keeps the surface free from stray bits when you do your final frosting.
- Compare with Cupcakes: This single bento cake uses roughly the same amount of batter as about 4 cupcakes but is shaped differently. If you ever run short on tins, you can repurpose your cupcake or muffin tray.
- Alternate Molds: If you don’t have a 4-inch tin, a round mold or even a large circle cutter on a sheet of baked cake can create the same effect. You simply cut the shape from a bigger sheet and frost it as a mini.
- Multiple Frostings: Chocolate, strawberry, or even whipped cream frostings can all work with this bento cake recipe. Some bakers also enjoy layering fruit slices between the cake layers.
- Keep a Link for Supplies: If you’d like to see the exact tools used here, you might find a helpful link on your favorite baking supply site. Many bakers also share tips in #bentocakes or #bentocake posts on social media.
- For 2024 Celebrations: Bento cakes remain a trendy choice, with more flavor combos popping up in every bakery.
Final Disclaimer for Tools (Affiliate Mention)
We are a participant in the Amazon Services LLC associates program, an affiliate advertising program designed to help sites earn fees by advertising and linking to Amazon. This advertising program is designed to provide a means for us to earn small commissions on items you buy through the link, at no extra cost to you.
Wrapping Up the Bento Cake Process
You’ve now got all the steps to make a bento cake that rivals anything you’d find in a professional bakery. This method is simple enough that even first-time bakers can follow along, yet flexible enough for a more advanced chef to add intricate designs. Whether you aim for a neat crumb coat and smooth finish or go wild with bright color swirls, your bento cake will surely delight anyone who tries it.
If you’ve seen #bentocake or #bentocakes on social media like reels India, you know how popular they’ve become. The size is small, but the design ideas are endless. Feel free to adapt this process as you explore new fillings, icing styles, and even cheesecake bento variations. People want desserts that travel well and look pretty, and these mini wonders check both boxes. Happy baking cakes, and enjoy your freshly decorated bento treat!
Pro Tips & Variations: Personalize Your Bento Cake
This section covers ways to get the most out of your bento cake recipe and offers creative twists to make each mini cake feel unique. Whether you’re adjusting flavor or exploring different decorating methods, these tips will help you personalize your small bento cakes with ease.
Choose the Right Pan Size
- Opt for 4-inch Tins: This good size ensures quick baking and a balanced sponge. If you want more servings, you can scale the recipe up and bake several at once.
- Try a Cutter: When you can’t find a 4-inch tin, bake a larger cake in a standard round pan and use a circle cutter to form the smaller cake layers. This approach helps if you plan multiple mini-variations.
Vary Your Sponge Flavors
- Chocolate Swap: Replace a portion of your flour with cocoa powder. Keep an eye on baking time, as chocolate cake can dry out if left too long.
- Citrus Infusion: Stir in lemon or orange zest for a bright punch. A drop of matching gel color can hint at the citrus flavor inside.
- Cheesecake Twist: Combine some softened cream cheese into your batter for a denser, creamy layer. This adds richness without complicating the method.
- Fruity Layers: If you love the combination of fruit and cake, try incorporating elements from this Strawberry Crunch Cake—it features a delicious strawberry flavor with a crunchy texture that could add an exciting twist to your bento cake.
Explore Different Fillings
- Jam and Fruit: A layer of strawberry jam or sliced fresh fruit between your cake layers creates a burst of sweetness.
- Caramel Center: Drizzle a thin spread of caramel for extra moisture. Caramel pairs nicely with chocolate frostings or a light vanilla base.
- Nut Butter Alternative: Peanut butter or almond butter can add depth. Spread it thinly, so it doesn’t overwhelm the subtle sponge. If you’re looking for a nut-free crunch, consider sprinkling some Nut-Free Granola between layers—it adds texture and a subtle sweetness without the need for nuts.
Experiment with Frostings
- Swiss Meringue Buttercream: For a smooth, less-sweet version, whip egg whites with sugar before blending in butter. This technique yields a lighter finish but might require a bit more practice.
- Whipped Cream: If you prefer less sweetness, a stabilized whipped cream can be a fresh alternative. Keep in mind that it may not hold complex piping shapes as well as buttercream.
- Ganache: A simple chocolate ganache works wonders for those who love rich, glossy finishes. Chill the ganache slightly so it sets before you attempt a crumb coat.
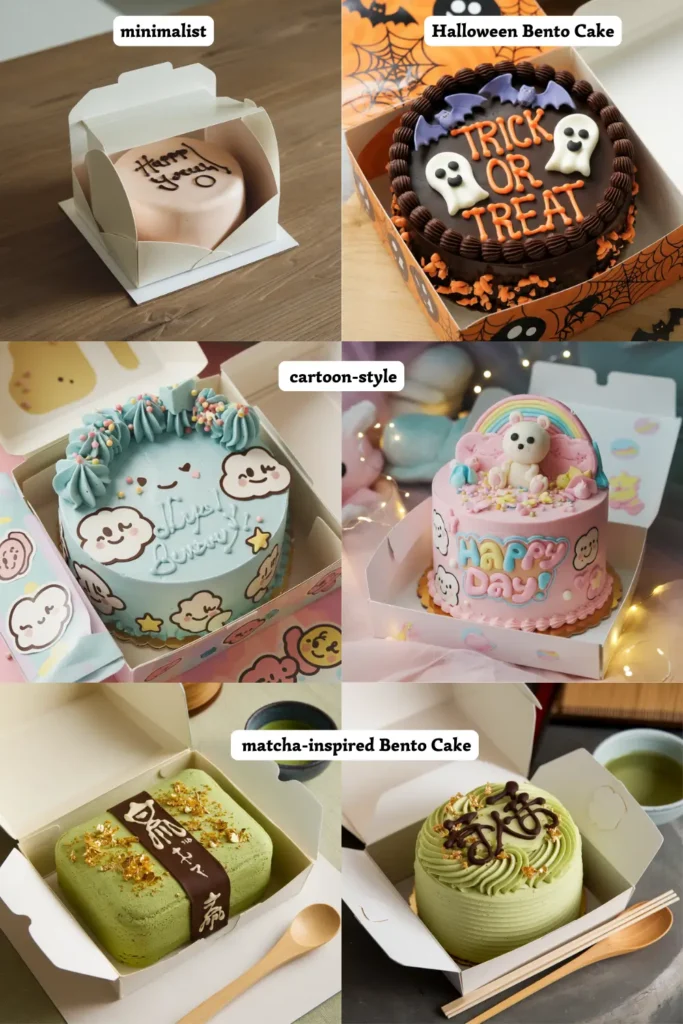
Tweak the Decoration
- Keep It Minimalist: Bento cakes often shine with a minimal design. A smooth coat of pastel buttercream with a small phrase piped on top is enough to create an appealing look.
- Multiple Colors: Divide your frosting into bowls and blend in different gel colors. Pipe multi-color swirls or stripes around the cake using separate piping bags. If you’re looking for vibrant inspiration, check out this Unicorn Cake—its dreamy, colorful aesthetic can be adapted for bento cakes!
- Edible Accents: For special events, you can dress up the cake with edible gold leaf, simple sugar flowers, or delicate fondant shapes.
- Natural Hues: If you prefer natural tints, explore freeze-dried fruit powders like strawberry or matcha for subtle color and flavor.
Perfect Your Crumb Coat
- Focus on Thin Layers: A crumb coat is just enough buttercream to trap stray crumbs. This layer can be a bit translucent, so don’t worry if the sponge peeks through.
- Chill Between Coats: After applying the crumb coat, chill the cake for 10–15 minutes. This step prevents crumb flecks from mixing into your final frosting coat.
- Smooth Tools: An offset spatula is your friend for an even layer. A turntable can help if you have one, but a steady hand works fine, too.
Adjust Baking Times
- Watch Your Oven: Small cakes can overbake quickly. Check them a few minutes earlier than you would a standard cake. If the toothpick comes out with a few crumbs, it’s close to done.
- Use Proper Temperature: A slightly lower oven temperature prevents the outside from browning too fast. If you see the top darkening prematurely, tent it with foil for the last few minutes.
Storage and Freshness
- Short-Term: Bento cakes can stay at room temperature for a day, especially if your kitchen is cool. The buttercream acts as a seal to keep the sponge moist.
- Long-Term: For extended storage, refrigerate in an airtight container. If you plan to keep it for more than two days, wrap it in plastic to lock in moisture.
- Bring to Room Temperature: Let the cake sit out for about 20 minutes before serving so the buttercream softens for a smooth bite.
Fun Serving Variations
- Lunchbox Presentation: If portability is key, nestle your cake into a lunch box lined with parchment for a clean look.
- Cupcake Comparison: Use leftover batter for 4 cupcakes if your bento tin is full. Cupcakes bake quickly, and you can decorate them alongside your main cake for variety.
- Include a Candle: Even a small, single bento cake can be festive for birthdays. Place a simple candle on top or add a mini topper for an instant party vibe.
Personalise with Finishing Touches
- Handwritten Messages: Write short notes using a fine piping tip. Keep the text minimal so it doesn’t overcrowd the surface.
- Fresh Fruit: Place a few berries or sliced fruit on top if you want a refreshing element. Pairing fresh fruit with buttercream provides both color and a tangy counterpoint to sweetness.
- Embellish with Chocolate: Drizzle a thin chocolate glaze or press chocolate shavings onto the sides. This is a quick way to enhance the visual appeal.
By applying these tips and experimenting with different variations, you can make a bento cake that matches anyone’s preferences. Whether you’re partial to a minimalist bday cake or love to create a bright, bold design, bento cakes provide a fun canvas for your baking creativity. Small details, like a neat crumb coat or a splash of color, go a long way in making each mini cake feel special. Next, we’ll move on to serving suggestions, where you can learn how to display these compact treats in style.
Presentation Ideas: Elevate and Serve Your Bento Cake
Serving bento cakes can be as simple or as creative as you like. These small desserts are designed to impress with minimal fuss, so presentation often comes down to a few thoughtful details. Here are some ideas to help you showcase each cake in the best possible light:
Pair with a Coordinated Box or Plate
- Lunchbox Packaging: Bento cakes got their name from the idea of a compact meal box, so placing your cake in a small lunch box or take-out box is a practical yet charming option. This setup keeps the cake stable and makes transport a breeze.
- Pretty Plates: For an at-home gathering, slide the mini cake onto a decorative plate or a small cake stand. A bright plate can highlight the cake’s color choices, while a neutral dish helps your buttercream designs stand out.
Add Simple Garnishes
- Fresh Fruit: Place a few strawberry slices or a handful of blueberries around your cake to give it a pop of color and a refreshing element.
- Edible Flowers: Scatter delicate edible petals on the plate. Their subtle hues can amplify the cake’s aesthetic without overpowering your existing design.
- Chocolate Shavings: If you want a quick finishing touch, grate a bit of dark or white chocolate over the top. It contrasts well with pastel buttercream or a classic vanilla sponge base.
Embrace the Minimalist Look
- One Statement Feature: Since bento cakes are small, a single accent can say it all—like a brief “Happy Birthday” piped in neat letters or a tiny fondant flower at the center.
- Soft Colors: Minimalist cakes often feature muted tones such as pale pink, baby blue, or lavender. A subtle color scheme underscores the dainty size of the dessert.
- Simplicity Wins: Too many sprinkles or large toppers can crowd the cake’s surface. Focus on a clean, polished look that lets the compact shape shine.
Make It Celebration-Ready
- Pop in a Candle: Even one small candle can transform your bento cake into a birthday centerpiece. Light it up for a personal moment that still feels special.
- Short Messages: Pipe a quick phrase—“Congrats” or “Love You”—if you’re gifting this to a friend or significant other. The smaller the cake, the more concise your lettering should be.
- Coordinate with the Event: Match your decoration to the theme or color palette of the party. Whether it’s a 21st birthday or a casual get-together, a fitting design can tie everything together.
Serve Alongside Other Treats
- Assorted Mini Desserts: If you’re hosting a small gathering, present the bento cake beside macarons, cookies, or fruit tarts. This assortment offers variety while keeping portions moderate.
- Cupcake Comparison: Since the batter often makes about 4 cupcakes in volume, you could bake a few cupcakes on the side for those who want different frosting flavors. Display them with the bento cake to create a mini dessert bar.
- Drink Pairings: A sweet slice goes well with tea, coffee, or even sparkling drinks. Offering a simple beverage menu can elevate the overall experience.
- Savory Contrast: If you want to balance out the sweetness, consider pairing your bento cake with a comforting savory dish like Garlic Parmesan Chicken Pasta. The creamy, cheesy flavors of the pasta provide a delicious contrast to the light and fluffy cake, making for a well-rounded meal experience.
Optimize for Instagram
- Good Lighting: A well-lit setting shows the cake’s texture and color details. Natural daylight near a window is usually the best option for quick snapshots.
- Use Props Sparingly: Wooden boards, marble slabs, or pastel backdrops work beautifully for photo setups. Keep the scene uncluttered so the bento cake remains the focus.
- Angles Matter: Take a moment to capture the cake from different perspectives—side, top-down, or a slight angle that highlights the piped designs. If you’re comfortable with videos, record a short reel of the final reveal.
Gift-Giving Touches
- Compact Carry: If you’re gifting the cake, place it in a sturdy bento box lined with parchment paper to protect the frosting. Tie a simple ribbon around the box for a polished finish.
- Handwritten Note: Slip a small note under the lid with your message. This personal detail often leaves a warm impression.
- Practical Storage: Make sure to let the recipient know if the cake should be kept chilled before serving. While buttercream is fairly stable, warm conditions may soften it over time.
Special Occasions and Themes
- Romantic Dinners: For an intimate date night, a single bento cake adds a sweet highlight to the meal. Decorate with heart-shaped fondant or a swirl of pastel buttercream.
- Birthdays and Graduations: Customize the frosting colors to match school hues or the birthday person’s favorite shades. A short phrase or small topper can sum up the celebration.
- Holidays: Swap in seasonal touches—green and red sprinkles for winter holidays, pastel eggs for spring events, or gold accents for New Year celebrations.
Room Temperature vs. Chilled
- Serve Slightly Cool: Many prefer letting the frosted cake sit at room temperature for about 15–20 minutes. The texture of the sponge and buttercream often improves as they soften.
- Maintain Decorations: In hot or humid environments, keep the cake chilled until close to serving. This approach helps prevent buttercream details from drooping or sliding.
Encourage Guests to Try a Slice
- Right-Size Portions: One bento cake typically satisfies one to two people. If you’re serving multiple guests, consider slicing it into several wedges or offering it as part of a dessert sampler.
- Highlight the Flavors: Remind everyone if you’ve tucked a special filling inside (like caramel or fruit jam… It’s a small detail, but it can excite guests anticipating more than a standard vanilla layer.
- Savor Each Bite: These mini cakes are easy to devour in just a few forkfuls, so encourage everyone to slow down and appreciate the soft, fluffy crumb and smooth buttercream.
Serving suggestions elevate a bento cake from a quick snack to a memorable mini treat. Whether you choose a minimalist design, elaborate piping, or a theme-based topper, the key is balancing simplicity with thoughtful details. In the next section, you’ll find a conclusion summarizing why these mini cakes are so appealing, plus answers to popular questions about bento cakes.
Conclusion: Your Essential Takeaways on Bento Cakes
The best part of making these mini desserts is the creative freedom you get. You can keep things minimalistic with a tidy buttercream design or layer on sprinkles, fondant accents, and colorful piping for a bolder look. Whether you’re a home baker exploring new trends or a professional chef aiming to offer trendy treats, bento cakes open the door to fresh possibilities. They also cater to people seeking smaller servings, which helps reduce food waste and allows for quick, fuss-free celebrations.
Another advantage is how easily these cakes travel. When you tuck them into a lunch box or a special bento cake box, you can take them to a friend’s house, a picnic, or even mail them if conditions allow. Their packaging and size make them an appealing gift, especially for those who appreciate something thoughtful and unique. In a market flooded with standard full-sized cakes, a small bento cake stands out.
As you explore more variations, remember that the key to a successful bento cake lies in balancing flavor, texture, and appearance. A soft sponge, a sweet (but not overpowering. buttercream, and a neat finishing touch work together to create a memorable treat. Don’t be afraid to experiment with different fillings, colors, or decorative piping tips. Each new batch is an opportunity to refine your technique and discover new flavor combos.
Overall, bento cakes offer an approachable, fun way to celebrate life’s moments. Their small size means less pressure, less cleanup, and plenty of reasons to whip them up more often. If you’ve followed along with each section of this guide, you now have the tools and confidence to make a bento cake that will charm anyone who sees or tastes it. Up next are the frequently asked questions, which will clarify the basics and help you dive even deeper into the bento cake concept.
Bento Cake: Mini Korean-Inspired Lunchbox Cake
Ingredients
Equipment
Method
- Preheat your oven to 160°C (320°F).
- Grease and line two 4-inch (10 cm) round cake pans (or one larger pan if you plan to cut out the mini circles afterward).
- Gather all ingredients and allow cold items (like eggs and milk) to come to room temperature.
- In a mixing bowl, beat the softened butter and sugar together until light and fluffy (about 2–3 minutes).
- This step incorporates air into the batter, ensuring a soft, spongy cake.
- Beat in the eggs one at a time, mixing well after each addition.
- Stir in the vanilla extract for extra flavor.
- In a separate bowl, whisk together flour, baking powder, and salt.
- Gradually add these dry ingredients to the butter-sugar mixture, alternating with the milk. Mix on low speed until just combined. Avoid overmixing to maintain a tender crumb.
- Divide the batter evenly between the two prepared pans. Smooth the top gently with a spatula.
- Bake for 18–20 minutes, or until a toothpick inserted in the center comes out clean.
- Let the cakes cool in their pans for 5 minutes, then carefully turn them onto a wire rack to finish cooling completely.
- In a clean bowl, whip the softened butter until creamy.
- Gradually add powdered sugar, followed by 1–2 tbsp milk and the vanilla extract. Continue mixing until you achieve a smooth, spreadable frosting.
- If desired, divide the buttercream into portions and stir in gel food coloring for a fun, colorful design.
- Level each cooled cake layer if needed.
- Spread a thin layer of frosting on one cake round, then sandwich with the second round.
- Apply a thin crumb coat of buttercream on the entire exterior and refrigerate for 10–15 minutes to set.
- Add the final coat of buttercream, smoothing the surface or creating textured designs.
- Use a piping bag with a small tip to pipe dots, swirls, or messages around the cake.
- Place any additional decorations, like fondant shapes or sprinkles, as desired.
- Carefully transfer the finished bento cake into a small takeout or lunchbox-style container for that signature look.
- Store in the refrigerator for up to 3 days. Bring to room temperature before serving for the best taste and texture.
Notes
Nutrition Information (per mini cake)
SERVING: 1 mini cake (approx. 1–2 servings) | CALORIES: ~300kcal | CARBOHYDRATES: 38g | PROTEIN: 4g | FAT: 14g | SATURATED FAT: 8g | SODIUM: 220mg (Values are approximate and could vary based on brands/ingredients used.)Recipe Notes
- Flavor Variations: Swap vanilla extract with almond or lemon extract for a different aroma.
- Gluten-Free Option: Replace all-purpose flour with a gluten-free baking blend.
- Storage Tip: If you bake a larger cake and cut it into small rounds, you can freeze leftover trimmings for cake pops.
Frequently Asked Questions
A Bento Cake is a small, individual-sized cake usually packed in a takeout box. Originating from South Korea, these adorable cakes are popular for their cute decorations and personalized messages.
Bento Cakes should be stored in the refrigerator in an airtight container. They are best enjoyed within 2-3 days to preserve freshness and texture.
Yes, you can make Bento Cakes a day in advance. Store them properly in the fridge and decorate just before serving for the freshest look and taste.
Bento Cakes are perfect for birthdays, anniversaries, Valentine’s Day, or as a personalized gift for any special occasion.
Absolutely! You can make Bento Cakes vegan by using plant-based milk, egg substitutes, and vegan butter in your cake recipe.