Chicken And Cheese Jalousie: How To Make It Crispy
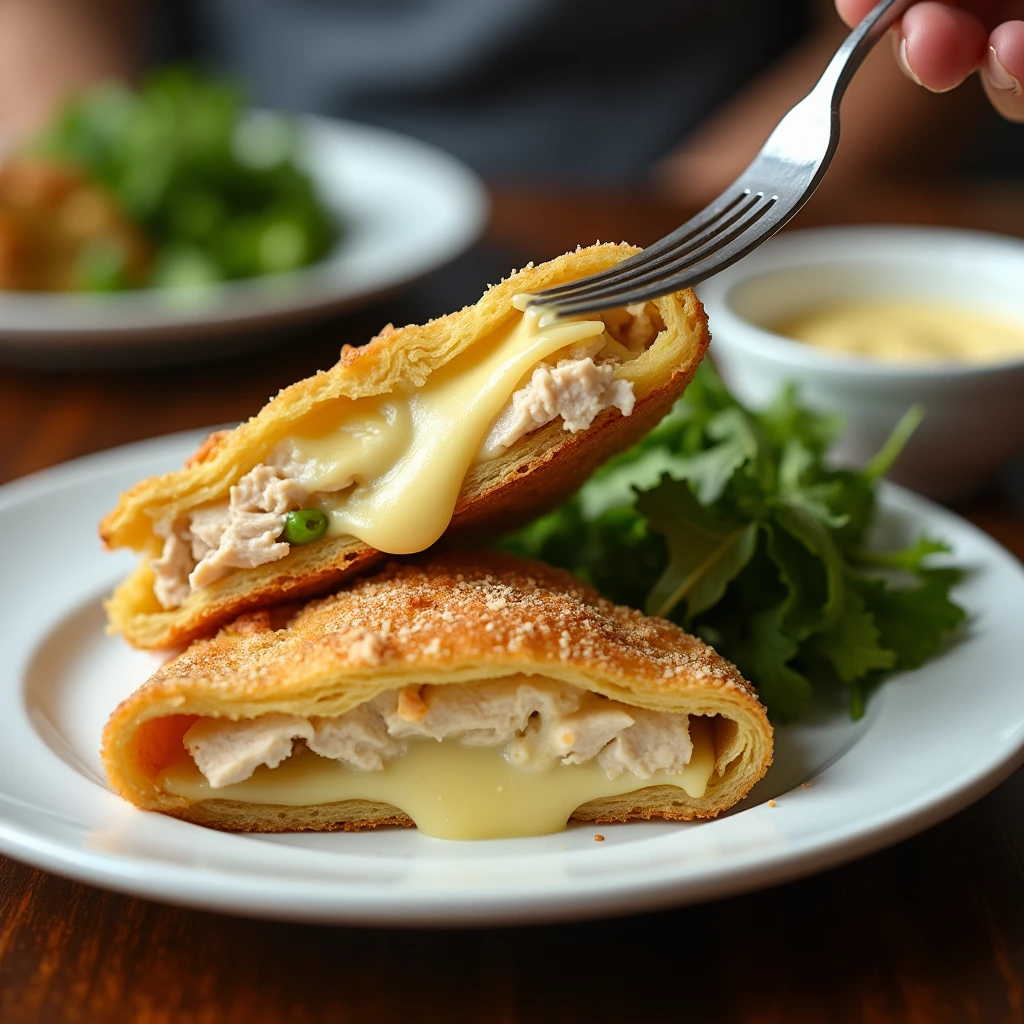
There’s something truly irresistible about the combination of crispy, golden puff pastry and a rich, cheesy filling—and that’s exactly what makes this Chicken and Cheese Jalousie a must-try dish! Whether you’re looking for an easy yet elegant meal, a flaky pastry treat for brunch, or a savory snack to impress your guests, this recipe delivers on all fronts.
If you’re a fan of rich, cheesy flavors, don’t miss our Garlic Parmesan Chicken Pasta—an irresistible creamy delight! This pasta dish is the perfect complement to a cheesy pastry like this jalousie, offering a comforting, indulgent meal experience.
Imagine tender, seasoned chicken, perfectly blended with melty cheddar and mozzarella, all wrapped in buttery, flaky layers that bake to perfection. The best part? It’s surprisingly simple to make! With just a handful of ingredients and a few pro tips, you’ll have a gourmet-style pastry fresh from your own oven.
Perfect for a weeknight dinner, a holiday spread, or a grab-and-go lunch, this jalousie is as versatile as it is delicious. So, are you ready to create a bakery-worthy pastry at home? Let’s dive in!
What Is a Chicken and Cheese Jalousie?
A Crispy, Flaky Pastry You’ll Love
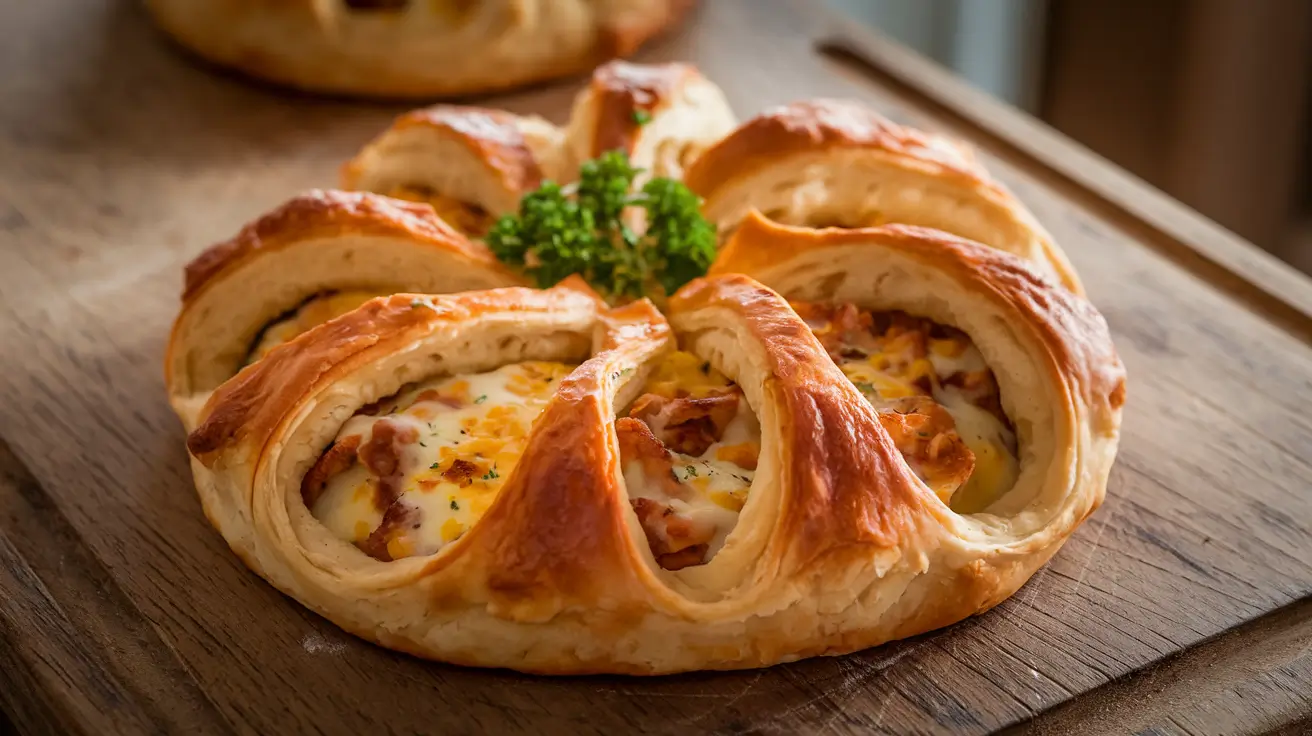
Imagine biting into a golden, flaky pastry filled with savory chicken, gooey melted cheese, and aromatic herbs—pure comfort in every bite! This Chicken and Cheese Jalousie is a French-inspired savory puff pastry dish that combines a crispy crust with a rich, cheesy filling. Whether served as an appetizer, a light meal, or a party snack, this recipe is a showstopper.
But what exactly makes a jalousie different from other stuffed pastries? Unlike turnovers or empanadas, a jalousie features a signature slotted top, allowing steam to escape while baking. This technique enhances crispiness and gives the pastry its irresistible golden texture.
Understanding the Classic Jalousie Pastry
The jalousie pastry takes its name from French window shutters—both share a slatted design. Traditionally, jalousies are filled with sweet or savory ingredients, encased in buttery puff pastry, and baked until golden brown.
This chicken and cheese version transforms the classic into a hearty, flavorful delight. It’s perfect for those who love flaky, cheese-filled pastries but want something more substantial than a simple turnover.
How This Version Stands Out with Chicken and Cheese
While traditional jalousies often feature fruit or custard fillings, this recipe embraces savory goodness. Tender chicken breast, combined with a blend of creamy cheeses like cheddar, mozzarella, or Gruyère, creates an indulgent, satisfying bite.
What makes this version stand out?
- Golden, crisp layers of puff pastry
- Juicy, well-seasoned chicken for maximum flavor
- Melted cheese filling that oozes with every bite
- Perfectly baked pastry with a flaky, buttery texture
This combination of crispy, cheesy, and savory elements makes the Chicken and Cheese Jalousie a must-try dish for pastry lovers and home cooks alike.
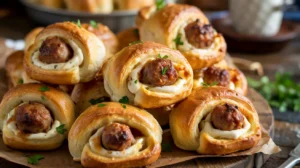
Why It’s a Must-Try Crispy and Flaky Dish
The magic of a perfect jalousie lies in its crispy exterior and flavorful filling. When baked correctly, the pastry puffs up beautifully, turns golden brown, and develops a delicate crunch.
Here’s why you’ll love making this dish:
Effortless elegance – Looks fancy but is simple to prepare
Customizable filling – Swap in different cheeses or add veggies
Great for meal prep – Make ahead and bake fresh when needed
Crowd-pleaser – Ideal for brunch, dinner, or entertaining guests
If you’ve never tried making a savory jalousie, this recipe is the perfect place to start. Stay tuned for the next section, where we’ll break down the best ingredients to achieve that crispy, golden crust!
Have you ever tried a jalousie before? Let us know in the comments!
Key Ingredients for the Best Chicken and Cheese Jalousie
The Secret to a Crispy, Golden Jalousie
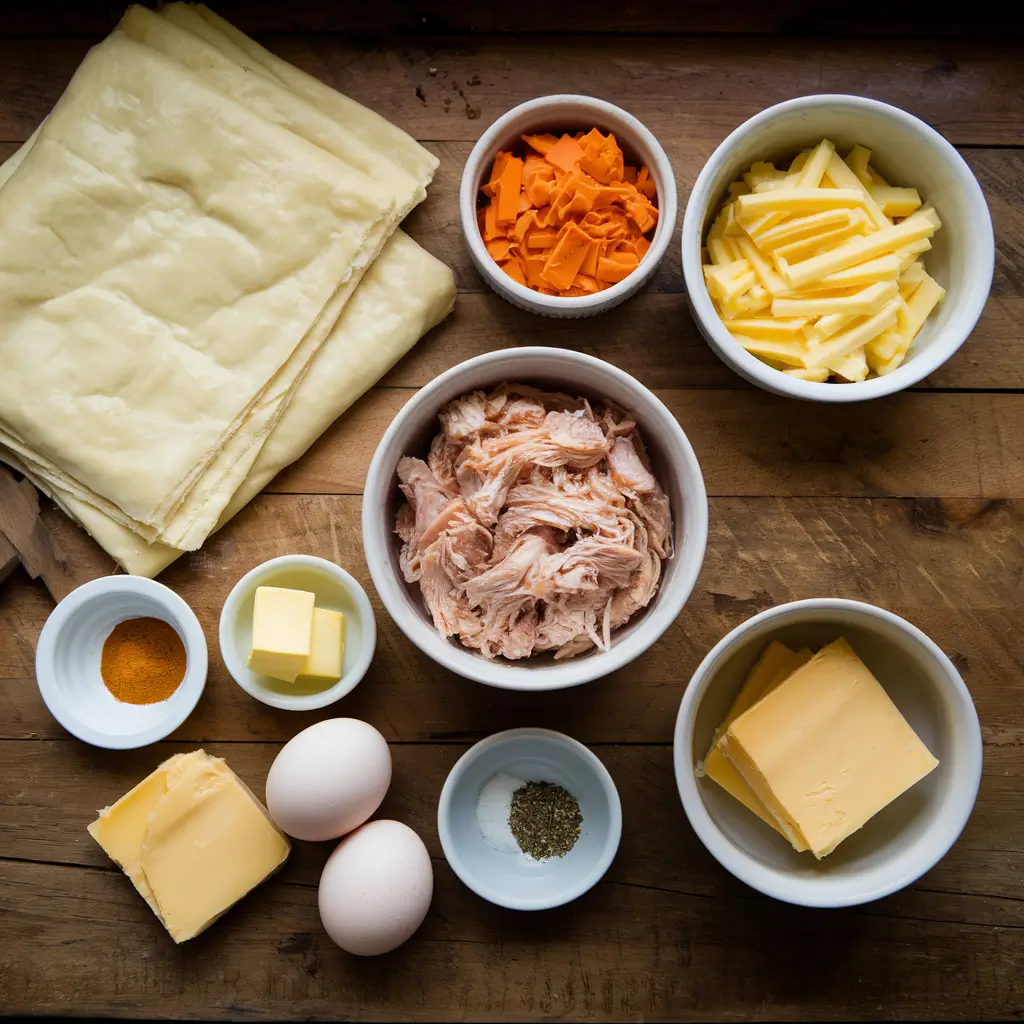
The success of a Chicken and Cheese Jalousie lies in its ingredients—each plays a crucial role in achieving the perfect balance of flakiness, crispiness, and rich flavor. From choosing the right type of chicken to selecting the best cheese blend, every detail matters. Below, we break down the essential ingredients and pro tips to help you create a delicious, restaurant-quality jalousie at home.
Choosing the Right Chicken: Fresh vs. Leftover
The chicken filling is the heart of this dish, so handling and storing it properly is essential for both safety and flavor. If using fresh chicken, always ensure it’s stored at or below 40°F (4°C) and cooked to an internal temperature of 165°F (75°C) to eliminate bacteria. For more details on safe chicken handling and storage, refer to: “Chicken from Farm to Table“. Here’s what you need to know when selecting your chicken:
- Fresh Chicken Breast: Best for a tender, juicy texture. Cook and shred it for even distribution in the filling.
- Leftover Rotisserie Chicken: A time-saving option that adds extra depth of flavor. Just shred and season before using.
- Chicken Thighs: If you prefer more juiciness, use boneless, skinless chicken thighs for a richer taste.
Pro Tip: Season the chicken with garlic, paprika, black pepper, and a touch of thyme for an extra flavor boost.
Best Cheeses for a Creamy, Melty Filling
Cheese is what gives this jalousie its gooey, indulgent texture. A mix of cheeses works best for flavor complexity and meltability.
Cheddar – Sharp and tangy, adds depth to the filling.
Mozzarella – Ensures a perfect cheese pull and creamy consistency.
Gruyère or Swiss – Enhances the richness with a nutty undertone.
Custom Twist: Want a gourmet touch? Try blue cheese or feta for a tangy kick!
Puff Pastry Secrets: How to Get That Golden Crispiness
The puff pastry is what makes this dish truly irresistible. To get that light, flaky, and golden crust, keep these tips in mind:
- Use Store-Bought Puff Pastry for Convenience: Choose all-butter puff pastry for the best texture.
- Keep It Cold: Always chill the pastry before baking—this helps it puff up beautifully.
- Score the Top Properly: Cutting slits into the pastry (like window blinds) allows steam to escape, preventing sogginess.
Pro Tip: Brush with an egg wash (a mix of egg yolk and milk) to achieve a deep golden-brown color and extra crispiness.
Herbs and Seasonings for Extra Flavor
A well-seasoned filling takes this dish to the next level. Herbs and spices add depth, making each bite more flavorful.
Essential Seasonings:
Garlic powder – Enhances the savory taste
Paprika – Adds a hint of smokiness
Black pepper – Balances out the richness
Dried thyme or oregano – Brings an earthy aroma
Creative Twist: Love heat? Add a pinch of red pepper flakes or smoked paprika for a spicy kick!
Final Thoughts: The Perfect Ingredient Combination
By selecting high-quality chicken, a well-balanced cheese blend, and buttery puff pastry, you’re setting yourself up for the ultimate crispy, cheesy jalousie experience. Now that you know the best ingredients, let’s move on to the next section, where we’ll walk through the step-by-step process of assembling and baking your jalousie to perfection.
Step-by-Step Guide to Making a Crispy Chicken and Cheese Jalousie
Mastering the Perfect Jalousie Pastry
A well-made Chicken and Cheese Jalousie is all about achieving the right balance between a crispy, golden puff pastry and a creamy, flavorful filling. Follow this step-by-step guide to ensure your jalousie turns out flaky, cheesy, and irresistibly delicious every time.
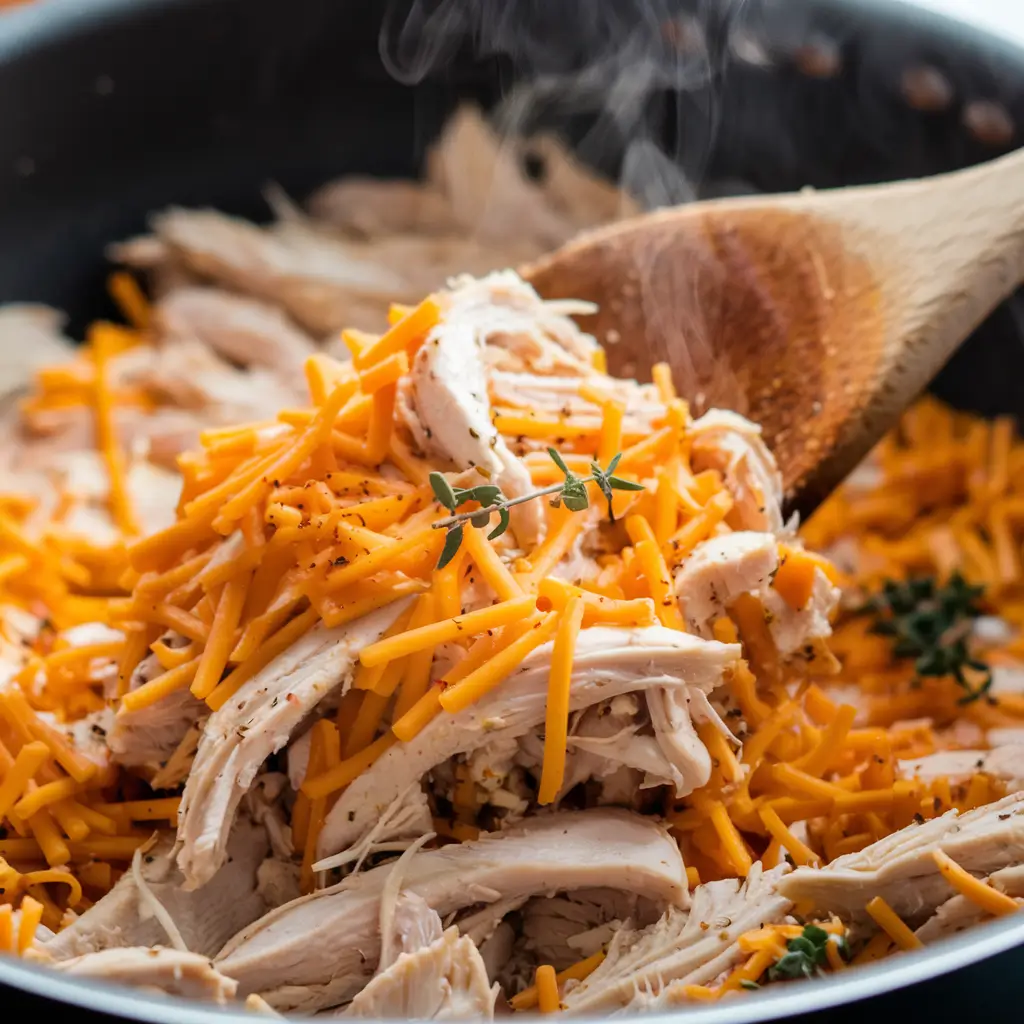
Preparing the Filling for Maximum Flavor
Before assembling your jalousie, start with a well-seasoned, juicy chicken and cheese filling.
Cook the Chicken:
- If using fresh chicken, season it with garlic powder, paprika, salt, and pepper, then sauté or roast until fully cooked. Shred or dice it into small pieces.
- If using leftover chicken, simply shred and season to enhance its flavor.
Melt the Cheese:
- In a pan, mix cheddar, mozzarella, and Gruyère with a splash of cream to create a smooth, melty texture.
- Stir in the shredded chicken and let it coat evenly with the cheesy mixture.
Enhance the Flavor:
- Add fresh or dried thyme, oregano, and a dash of mustard for extra depth.
- For a spicy kick, mix in red pepper flakes or a pinch of cayenne.
Pro Tip: Let the filling cool completely before assembling the jalousie—this prevents the pastry from turning soggy.
Assembling the Jalousie: Layering, Cutting, and Sealing
Once your filling is ready, it’s time to assemble the pastry for a perfect bake.
Prepare the Puff Pastry:
- Roll out two sheets of puff pastry to equal size on a floured surface.
- Place one sheet on a lined baking tray.
Add the Filling:
- Spoon the cooled chicken and cheese mixture onto the pastry, leaving a 1-inch border around the edges.
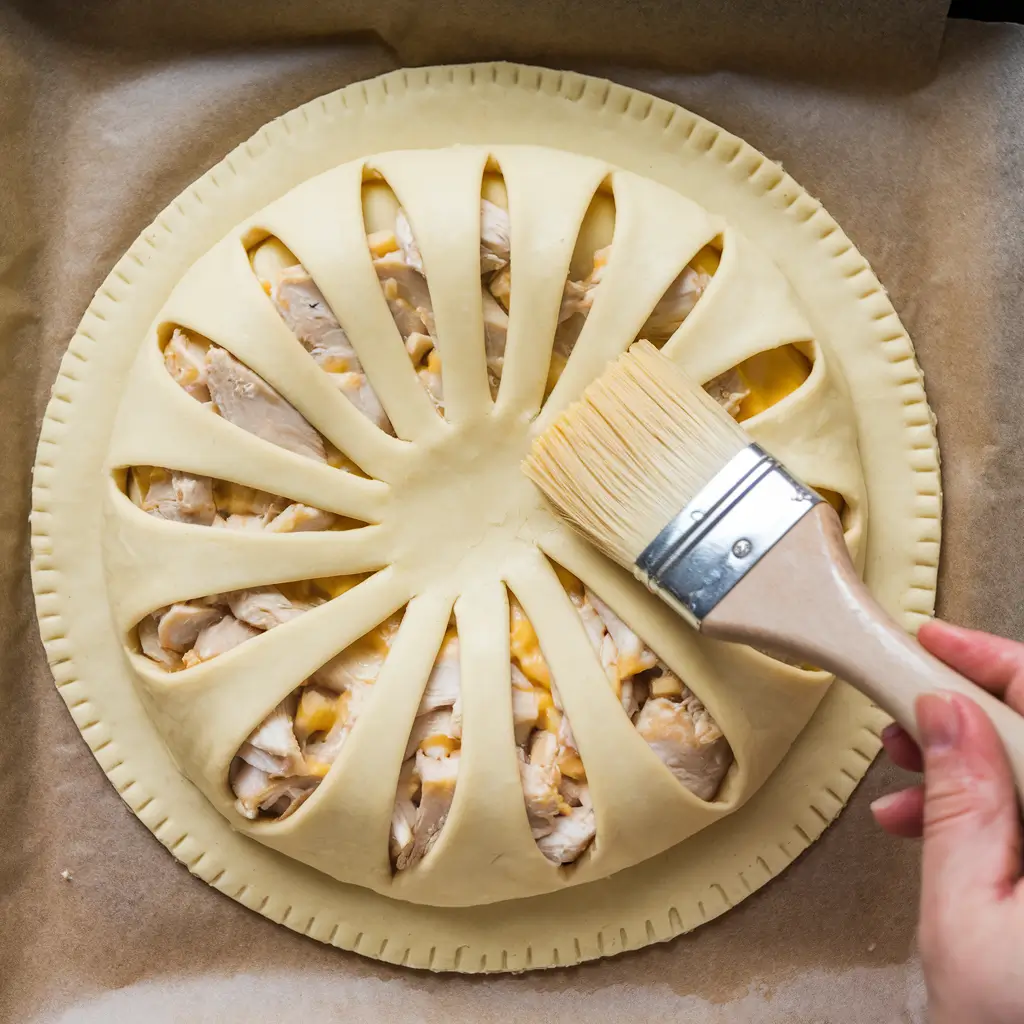
Create the Jalousie Pattern:
- Take the second puff pastry sheet and cut slits along the top (like window blinds).
- Carefully place it over the filled pastry and press the edges to seal.
Seal and Crimp the Edges:
- Use a fork or your fingers to crimp the edges to lock in the filling.
- Brush the top with an egg wash for a golden finish.
How to Score and Brush the Pastry for Perfect Crispiness
The key to a flaky, golden-brown jalousie lies in proper scoring and brushing techniques.
Scoring: The slits on the top layer allow steam to escape, preventing sogginess.
Egg Wash: Brush the top with a mixture of egg yolk and milk for a rich, glossy finish.
Optional Butter Wash: For extra crispiness, brush melted butter over the pastry before baking.
Pro Tip: For extra crunch, sprinkle a pinch of sea salt or sesame seeds on top before baking.
Baking Tips: Oven Temperature and Time for Best Results
Now, it’s time to bake your jalousie to perfection!
Preheat the Oven:
- Set your oven to 400°F (200°C) for optimal puffing and crispiness.
Bake on the Middle Rack:
- Place the jalousie in the center of the oven to ensure even heat distribution.
- Bake for 20-25 minutes or until the pastry is golden brown and crisp.
Cooling for a Perfect Texture:
- Let the jalousie rest for 5 minutes before slicing to allow the filling to set.
- Transfer to a cooling rack to prevent the bottom from getting soggy.

Pro Tip: For extra crunch, bake on a preheated baking stone or steel tray.
Final Thoughts: Your Crispy Jalousie Is Ready!
By following these expert steps, your Chicken and Cheese Jalousie will turn out perfectly crisp, golden, and bursting with cheesy goodness. Now that you’ve mastered the assembly and baking process, let’s dive into pro tips for keeping your jalousie extra crispy!
Pro Tips to Keep Your Chicken and Cheese Jalousie Extra Crispy
The Secret to a Flaky, Golden-Brown Jalousie
Nothing is more disappointing than a soggy or limp pastry—especially when you’re expecting a light, flaky, and golden crust. If you want your Chicken and Cheese Jalousie to stay crispy and delicious, follow these expert tips to avoid excess moisture and achieve a perfectly crisp pastry every time.
How to Prevent a Soggy Bottom
A soggy pastry bottom is one of the most common issues with puff pastry-based recipes. Here’s how to avoid it and keep your jalousie crisp:
Use a Baking Sheet, Not a Deep Pan – A flat, lined baking sheet allows air circulation, preventing steam buildup that can soften the crust.
Chill the Assembled Jalousie Before Baking – Puff pastry needs to stay cold before hitting the oven. If it warms up too much, the butter layers melt prematurely, leading to a dense, greasy texture instead of a light, crispy flake.
Drain Excess Moisture from the Filling – Before assembling, let the chicken and cheese filling cool completely to avoid excess steam inside the pastry. If using vegetables like mushrooms or spinach, sauté and drain them well before adding to the filling.
Bake at the Right Temperature – A hot oven (400°F / 200°C) ensures the pastry cooks quickly and crisps up before moisture has time to soak in.
Pro Tip: If your jalousie still seems undercooked on the bottom, bake it for the last 5 minutes directly on the oven rack for extra crispiness.
The Secret to Achieving a Golden, Flaky Crust
The best part of a jalousie is its golden, shatteringly crisp top layer. Here’s how to nail it every time:
Egg Wash for a Glossy Finish – Brush the top of the pastry with a mixture of egg yolk and a splash of milk or cream. This creates a rich, deep golden hue.
Butter for Extra Crispness – For an even flakier crust, lightly brush melted butter over the slits before baking. This enhances color, crispiness, and flavor.
Vent the Pastry Properly – The signature jalousie slits are not just decorative! They let out excess steam, preventing the pastry from getting soft or collapsing.
Avoid Overloading with Cheese – While it’s tempting to add extra cheese, too much can cause it to leak out, making the pastry greasy instead of crisp.
Pro Tip: Sprinkle a pinch of flaky sea salt or sesame seeds on top before baking for extra crunch and visual appeal.
Why Resting Time Matters Before Slicing
It’s tempting to cut into your fresh, golden jalousie immediately, but waiting just a few minutes makes a huge difference in maintaining crispness.
Lets the Cheese Set – Cutting too early can cause the cheese to ooze out too quickly, softening the pastry.
Helps the Pastry Hold Its Shape – Resting allows the structure to firm up, making it easier to slice without crushing the flaky layers.
Keeps the Bottom from Getting Soggy – Allowing a short rest time ensures moisture doesn’t redistribute unevenly.
Pro Tip: Transfer your jalousie to a wire cooling rack instead of leaving it on a baking sheet. This prevents condensation from softening the bottom.
Final Thoughts: Enjoy a Perfectly Crispy Jalousie Every Time!
By following these expert tricks, you can ensure that your Chicken and Cheese Jalousie stays delightfully crispy from the first bite to the last. Now that you’ve mastered the crisp factor, let’s talk about how to serve, store, and reheat your jalousie while keeping it just as delicious as when it was first baked!
Serving and Storage Tips for Your Homemade Jalousie
The Best Way to Enjoy a Freshly Baked Jalousie
A Chicken and Cheese Jalousie is best enjoyed straight out of the oven when the pastry is at its crispiest and the cheese is perfectly melted. But what’s the best way to serve, store, and reheat it without losing that flaky, buttery perfection? In this section, we’ll cover expert serving ideas, storage hacks, and reheating methods to keep your jalousie just as delicious as when it was first baked.
Best Sides to Pair with Chicken and Cheese Jalousie
While a jalousie is rich and satisfying on its own, pairing it with the right side dishes can turn it into a complete, well-balanced meal. Here are some perfect accompaniments:
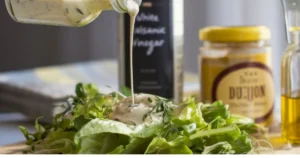
- Fresh Green Salad – A light arugula or mixed greens salad with a lemon vinaigrette balances out the richness.
- Roasted Vegetables – Serve with oven-roasted asparagus, zucchini, or bell peppers for added nutrition.
- Creamy Soup – Pair with tomato basil soup or a velvety mushroom bisque for a cozy meal.
- Dipping Sauces – Enhance the flavor with a garlic aioli, honey mustard, or a spicy sriracha mayo.
- Want to add a touch of sweetness to your meal? This pastry pairs beautifully with a slice of our Sweet Potato Bread—a soft, slightly sweet complement to the savory flavors.
Pro Tip: For a gourmet touch, sprinkle fresh herbs like parsley or chives on top before serving to enhance both flavor and presentation.
How to Store Leftovers Without Losing Crispiness
If you have leftover jalousie, storing it properly is key to maintaining its flaky texture and cheesy goodness. Here’s how to do it:
Refrigerate Properly:
- Let the jalousie cool completely before storing it.
- Wrap it loosely in parchment paper to prevent condensation.
- Place it in an airtight container and store it in the refrigerator for up to 3 days.
Freeze for Longer Storage:
- Cut the jalousie into individual portions for easy reheating.
- Wrap each piece tightly in plastic wrap, then place in a freezer-safe bag.
- Store in the freezer for up to 2 months.
Pro Tip: Avoid wrapping the jalousie in foil or plastic while still warm—this traps steam and makes the pastry soggy.
Reheating Tips to Keep the Pastry Flaky
Reheating a jalousie the right way is essential to restoring its crisp, golden crust. Avoid the microwave, as it makes the pastry chewy and soggy.
Best Method – Oven or Air Fryer:
- Preheat the oven to 375°F (190°C).
- Place the jalousie on a baking sheet lined with parchment paper.
- Bake for 10–12 minutes, or until the pastry is crisp and heated through.
Air Fryer Method (Quickest Option):
- Set the air fryer to 350°F (175°C).
- Reheat for 4–6 minutes, checking for crispiness.
Pro Tip: Place a small dish of water in the oven while reheating to prevent the pastry from drying out while keeping the crust crisp.
Final Thoughts: Enjoy Your Jalousie Anytime!
By following these serving, storage, and reheating tips, you can savor a crispy, flavorful Chicken and Cheese Jalousie anytime—whether freshly baked or reheated the next day. Now that you know how to keep your pastry crisp and delicious, it’s time to get baking and impress your family or guests with this irresistible dish!
FAQs
Food Safety and Storage
Perishable foods like cooked chicken and cheese should not be left at room temperature for more than two hours. Beyond this, they enter the “danger zone” (40°F-140°F), where bacteria can multiply rapidly, increasing the risk of foodborne illnesses.
Combining Chicken and Cheese
Yes, combining chicken and cheese is a popular culinary practice. The mild flavor of chicken pairs well with various cheeses, enhancing the overall taste and texture of dishes.
Absolutely, chicken and cheese can be consumed together. This combination is common in many cuisines and is safe to eat, provided both ingredients are properly prepared and cooked.
Yes, it is safe to drink milk after consuming chicken. There is no scientific evidence to suggest that combining poultry and dairy products poses any health risks.
No, consuming meat and dairy together does not interfere with digestion. The human digestive system is capable of processing multiple food types simultaneously without issues.
The digestion time for chicken varies based on factors like cooking method and individual digestive health. On average, it takes about 2 to 4 hours for chicken to move through the stomach and into the small intestine.
Cheese Pairings with Chicken
Several cheeses melt well and pair excellently with chicken, including:
Mozzarella: Known for its creamy texture and excellent melting properties.
Provolone: Offers a mild flavor and melts smoothly, making it ideal for chicken dishes.
Cheddar: Provides a sharper taste and creamy melt, adding depth to the dish.
The best cheese pairing depends on the desired flavor profile:
Parmesan: Its sharp, salty flavor complements chicken, especially in Italian-inspired dishes.
Ricotta: Adds creaminess and mild flavor, perfect for stuffed chicken recipes.
Goat Cheese (Chèvre): Its tangy flavor pairs well with the mildness of chicken.

Crispy Chicken and Cheese Jalousie Recipe
Ingredients
Equipment
Method
- In a medium saucepan over medium heat, melt the butter and sauté the garlic until fragrant.
- Add the shredded chicken, heavy cream, paprika, black pepper, salt, and thyme. Stir well to combine.
- Reduce heat and fold in the cheddar, mozzarella, and Gruyère cheese. Stir until fully melted and creamy.
- Remove from heat and let the mixture cool completely before assembling the jalousie.
- Preheat your oven to 400°F (200°C) and line a baking sheet with parchment paper.
- Roll out the puff pastry and place it on the baking sheet.
- Spoon the cooled filling evenly over one half of the pastry, leaving a 1-inch border around the edges.
- Fold the other half of the puff pastry over the filling. Seal the edges by crimping them with a fork.
- Use a sharp knife to cut slits across the top pastry layer for steam release.
- Brush the top with the egg wash for a golden finish.
- Bake for 20-25 minutes or until the pastry is puffed, golden brown, and crispy.
- Let the jalousie rest for 5 minutes before slicing.
- Garnish with fresh parsley and grated Parmesan, then serve warm with your favorite dipping sauce!
Notes
Nutrition Information (Per Serving)
SERVING: 220 g | CALORIES: 540 kcal | CARBOHYDRATES: 28 g | PROTEIN: 32 g | FLUIDS: 35 g | SATURATED FLUIDS: 13 g | CHOLESTEROL: 100 mg | SODIUM: 880 mg | POTASSIUM: 460 mg | FIBER: 3 g | SUGAR: 3 g | VITAMIN A: 160 IU | VITAMIN C: 5 mg | CALCIUM: 210 mg | IRON: 2.1 mgRecipe Notes & Tips
- Storage: Store leftovers in an airtight container in the refrigerator for up to 3 days.
- Reheating: For best results, reheat in an oven at 350°F (175°C) for 5-7 minutes to retain crispiness.
- Substitutions: Swap cheddar for gouda or mozzarella for Swiss for a different flavor profile.
- Make-Ahead Option: Assemble the jalousie up to 24 hours ahead, cover, and refrigerate until ready to bake.
Conclusion: Master the Perfect Chicken and Cheese Jalousie
Now that you have all the expert tips and techniques for making a crispy, golden Chicken and Cheese Jalousie, you’re ready to bring this flavorful dish to life! From selecting the best ingredients to assembling, baking, and keeping your pastry irresistibly crisp, every step ensures that you create a restaurant-quality jalousie right at home.
The secret to success? Keeping the puff pastry cold, properly venting the slits, and following the right baking techniques for a beautifully flaky crust. Pair it with your favorite sides, store leftovers the right way, and use the best reheating methods to maintain that fresh-baked perfection. Whether you’re serving it for a weeknight meal, a party appetizer, or a cozy brunch, this jalousie is sure to impress.
If you’re looking for another way to enjoy chicken, try our Chicken Taco Soup for a comforting and flavorful twist—it’s packed with bold flavors and perfect for a cozy meal.
Now it’s your turn! Try this recipe and let us know how it turns out. Did you add any personal twists? Do you have a favorite cheese combination? Share your experience in the comments below—we’d love to hear your thoughts!
And if you enjoyed this recipe, don’t forget to share it with your friends and family or explore more delicious chicken and pastry recipes for your next culinary adventure. Happy baking!


One Comment