Quick pickled radishes are an easy way to turn a fresh bunch of red radishes into a crisp, tangy topping. The thin slices are covered with a warm brine made from distilled white vinegar, water, sugar, and pickling salt, then chilled until bright pink and flavorful.
This small-batch refrigerator pickle works well on tacos, salads, grain bowls, sandwiches, wraps, and appetizer platters. The active preparation takes about 10 minutes, and the radishes can be tasted after they have chilled for about one hour.
Quick Answer
Slice fresh red radishes about 1/8 inch thick and pack them into a clean, sanitized pint jar. Cover them with a warm brine made from 5% distilled white vinegar, water, sugar, and pickling salt. Refrigerate the jar and taste the radishes after about one hour.
| At a Glance | Details |
|---|---|
| Method | Refrigerator pickle |
| Jar size | 1-pint jar |
| Active time | About 12 minutes |
| First taste | After about 1 hour of chilling |
| Flavor development | 4 to 24 hours |
| Yield | About 1 1/2 cups |
| Storage | Up to 2 weeks refrigerated |
| Canning | Not suitable for water-bath canning |
Why You’ll Like These Quick Pickled Radishes
- Fast preparation: The radishes require only about 10 minutes of hands-on work.
- Small-batch yield: One bunch of radishes fits into a practical pint-size jar.
- Balanced flavor: Sugar softens the sharp vinegar flavor without turning the radishes into a sweet pickle.
- Versatile topping: The crisp slices work with tacos, bowls, sandwiches, salads, and party platters.
- No canning equipment: This is a simple refrigerator pickle that remains chilled from preparation through storage.
Ingredients You Need
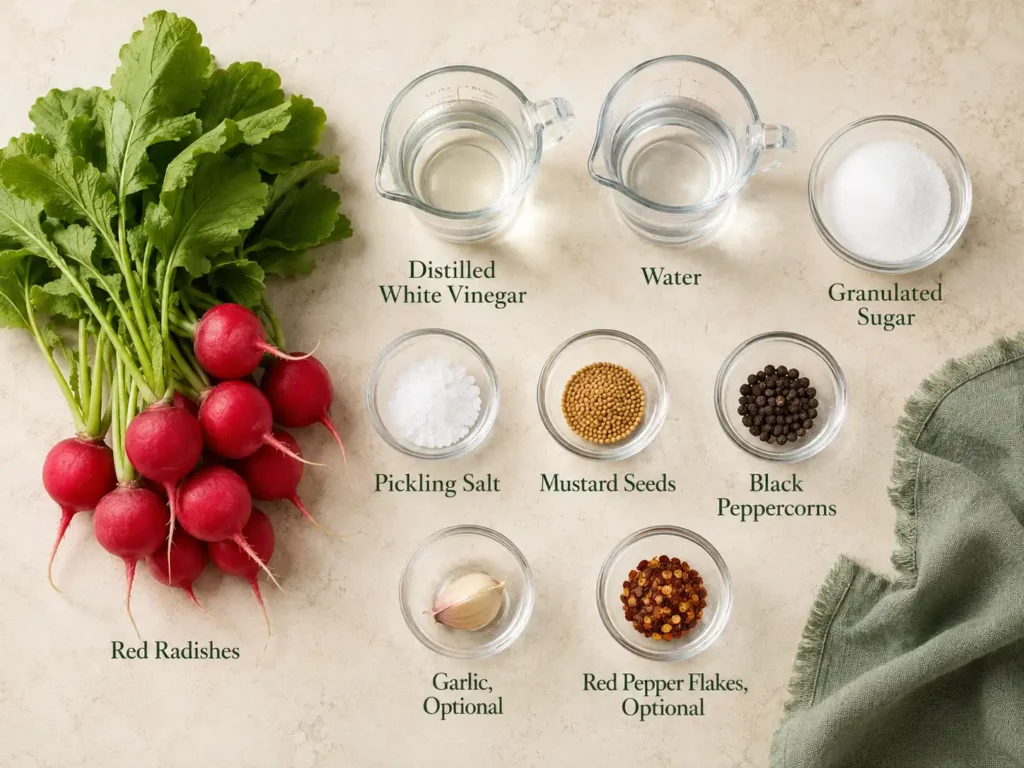
Fresh Red Radishes
Use one bunch of fresh red radishes weighing approximately 8 ounces after the leafy tops are removed. Choose radishes that feel firm and look free from soft spots, mold, or major damage.
Cutting the radishes into uniform 1/8-inch rounds helps them absorb the brine at a similar rate. A sharp knife works, but a mandoline with its hand guard produces especially even slices.
Distilled White Vinegar
Use distilled white vinegar labeled 5% acidity. Its neutral flavor allows the peppery character and pink color of the radishes to remain noticeable.
This recipe is developed only for refrigerator storage. Do not use vinegar with an unknown acidity, and do not convert this formula into a shelf-stable canning recipe.
Water, Sugar, and Pickling Salt
Water softens the intensity of the vinegar. Granulated sugar balances its sharpness, while pickling salt seasons the vegetables and dissolves cleanly in the brine.
Use pickling salt rather than measuring coarse kosher salt by volume. Different salt crystal sizes can produce noticeably different levels of saltiness.
Mustard Seeds and Peppercorns
Mustard seeds and whole black peppercorns give the base recipe a mild savory flavor. They should complement the radishes rather than overpower them.
Optional Garlic and Red Pepper Flakes
Add one small garlic clove for a more aromatic pickle. Crushed red pepper flakes are also optional and provide gentle heat.
Helpful Tools for This Recipe
- A clean, sanitized, heat-safe 1-pint glass jar with a lid
- A sharp chef’s knife and stable cutting board
- A mandoline with a hand guard for even slices
- A small stainless-steel or other nonreactive saucepan
- Liquid and dry measuring cups and spoons
- A wide-mouth funnel for neater pouring
- Small serving tongs or a condiment fork
How to Make Pickled Radishes
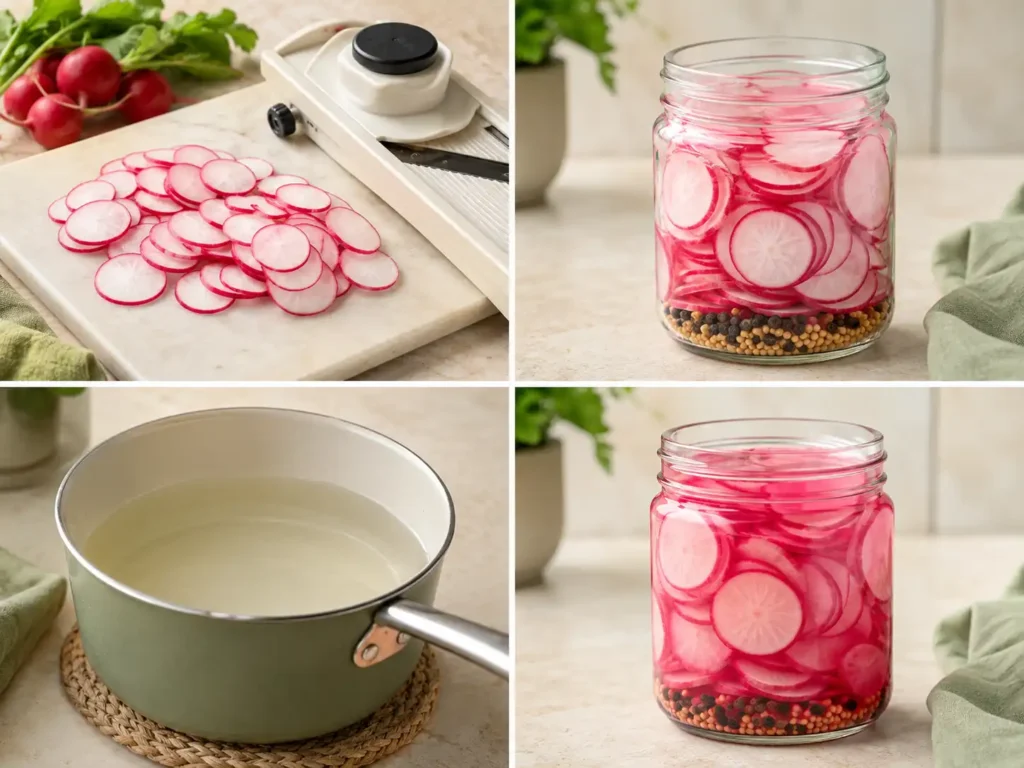
1. Prepare the Jar and Radishes
Begin with a clean, sanitized, heat-safe pint jar and lid. Wash the radishes thoroughly under running water. Remove the leafy tops and thin root ends, then discard any radishes that are soft, moldy, slimy, or badly damaged.
2. Slice the Radishes Evenly
Cut the radishes into rounds approximately 1/8 inch thick. Keep the slices as even as possible so they develop a consistent texture and flavor.
When using a mandoline, always use the hand guard. Do not hold a small radish directly against the blade with your fingertips.
3. Pack the Pint Jar
Place the mustard seeds and peppercorns in the bottom of the jar. Add the garlic and red pepper flakes when using them.
Pack the radish slices into the jar without crushing them. Leave enough room for the brine to move around the slices.
4. Prepare the Brine
Combine the distilled white vinegar, water, sugar, and pickling salt in a small nonreactive saucepan.
Warm the mixture over medium heat, stirring until the sugar and salt have dissolved. This usually takes about one to two minutes. The brine should be warm but does not need to boil for an extended period.
5. Add the Brine
Carefully pour the warm brine over the radishes until all the slices are covered. A small amount of brine may remain, depending on the shape of the jar and how tightly the radishes are packed. Discard any unused brine.
Gently tap the jar on the counter or run a clean utensil around the inside edge to release trapped air bubbles. Make sure the radishes remain below the surface of the brine.
6. Cool and Refrigerate
Allow the jar to stand briefly until it is no longer steaming. Cover it and transfer it promptly to a refrigerator set at 40°F or below.
Chill the radishes for at least one hour before tasting. Their color and flavor will continue to develop during the next 4 to 24 hours.
How Long Before Pickled Radishes Are Ready?
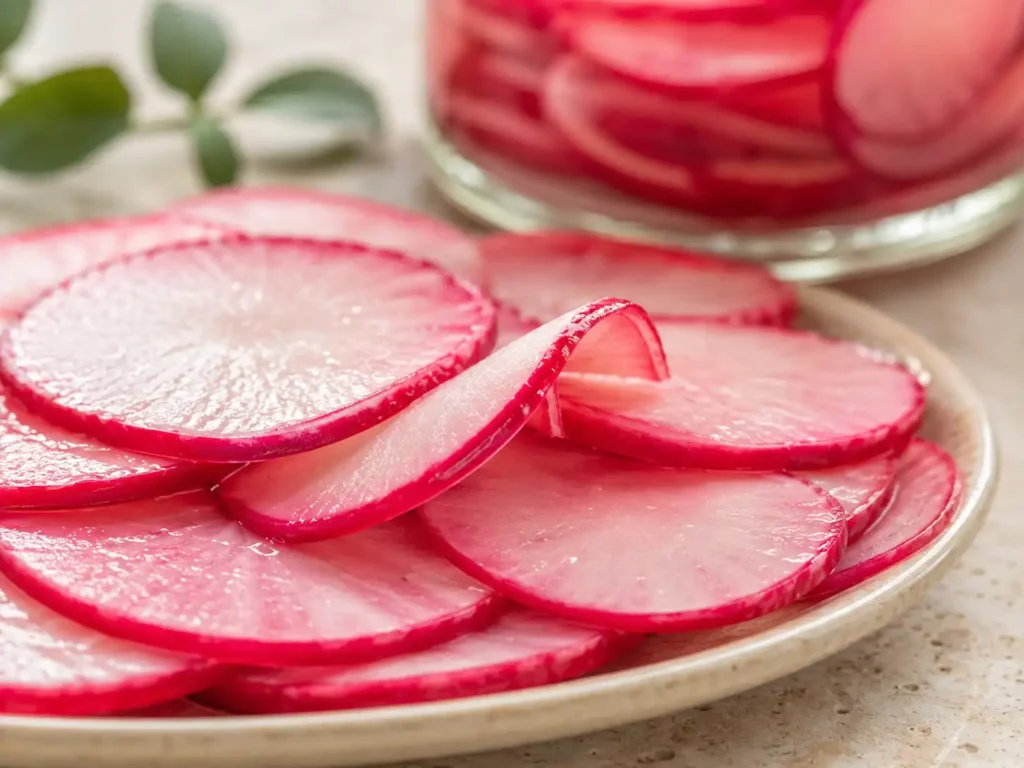
Thin, 1/8-inch slices can be tasted after approximately one hour in the refrigerator. At this stage, they should have a light vinegar flavor while retaining much of their fresh crunch.
For a more developed pickle flavor, refrigerate them for 4 to 24 hours before serving. Thicker pieces require more time than thin rounds.
Warm Brine vs. Cold Brine
This recipe uses a warm brine because warming the liquid dissolves the sugar and salt quickly and begins seasoning the thin slices.
A cold-brine method may preserve slightly more of the radishes’ raw snap and color, but it generally requires a longer resting period. Use one complete method rather than switching between hot and cold instructions halfway through the recipe.
Troubleshooting Pickled Radishes
| Problem | Possible Cause | What to Do |
|---|---|---|
| Too salty | The salt was overmeasured, or a coarse salt was substituted by volume. | Drain the slices well before serving. For the next batch, measure pickling salt precisely and do not add extra salt. |
| Too sweet | The sugar flavor is more noticeable than expected. | Serve the radishes well drained. A future batch can use less sugar, but the resulting flavor will be sharper. |
| Too soft | The radishes were not fresh, the slices were extremely thin, the brine was boiling hot, or the jar was stored too long. | Start with very firm radishes, keep slices close to 1/8 inch, avoid prolonged boiling, and use the batch within the recommended period. |
| Uneven flavor | The slices vary in thickness or have not chilled long enough. | Cut uniform rounds and allow the jar to rest for several more hours. |
| Strong radish aroma | The natural radish aroma has become more concentrated inside the sealed jar. | Keep the jar tightly covered. Discard the batch if there is an off odor together with mold, slime, unusual pressure, or other suspicious changes. |
| Floating slices | The jar is loosely packed or contains more brine than needed. | Press the slices gently below the brine with a clean utensil. Use a smaller jar for a reduced batch. |
Ways to Use Pickled Radishes
Drain the radishes before adding them to dishes so excess brine does not make the food watery.
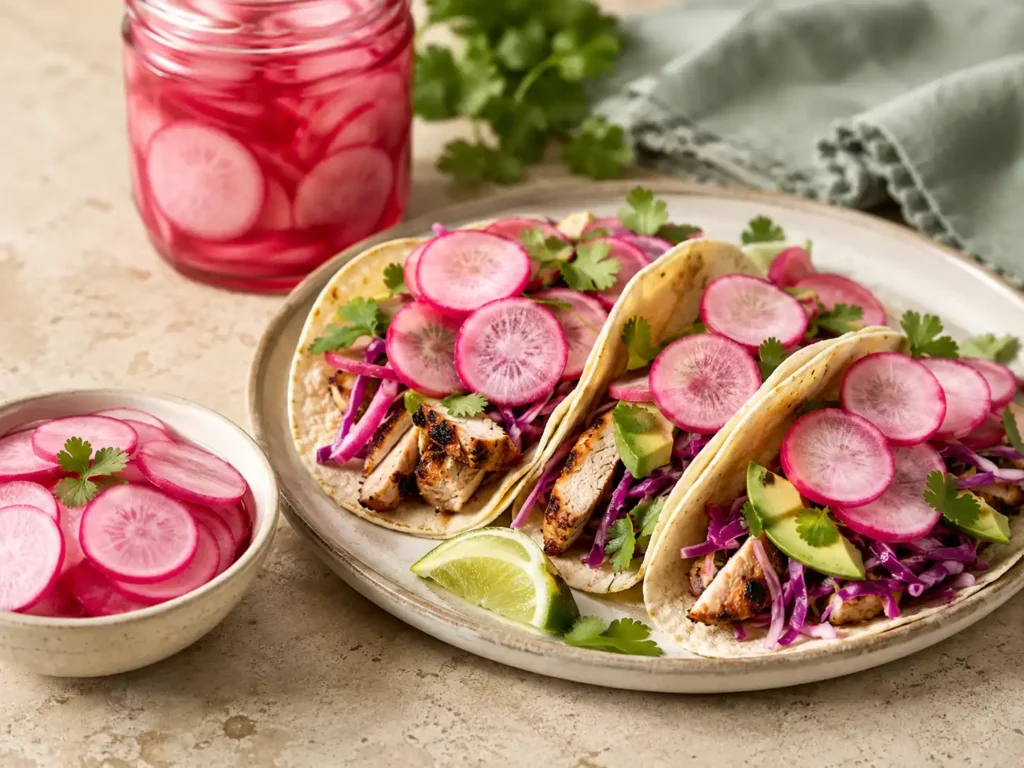
- Use them as a crisp topping for taco salad recipes.
- Add them to tacos filled with chicken, shrimp, beef, beans, or grilled vegetables.
- Spoon them over a roasted veggie grain bowl.
- Layer them into sandwiches, burgers, wraps, and pita pockets.
- Serve them with avocado toast or egg dishes.
- Add them to appetizer platters and finger-food boards.
- Use a few slices to balance rich, creamy, or cheese-topped dishes.
Flavor Variations
Spicy Pickled Radishes
Add the optional crushed red pepper flakes to the jar. Begin with the amount listed in the recipe so the heat does not cover the natural radish flavor.
Garlic and Dill
Add the optional garlic clove and a small sprig of fresh dill. Make sure the dill is clean and fresh before placing it in the jar.
Mustard Seed and Peppercorn
Keep the base combination of mustard seeds and black peppercorns for a simple, savory pickle that works with many dishes.
Other Radish Varieties
Daikon and watermelon radishes can also be quick-pickled, but their size, density, and moisture level differ from small red radishes. Cut them into uniform pieces and expect their ideal resting time and final texture to vary.
Storage and Food Safety
These quick pickled radishes are refrigerator pickles. They are not fermented, canned, vacuum-sealed, or shelf-stable.
- Store the covered jar at 40°F or below.
- Refrigerate the jar promptly after preparing it.
- Keep the radish slices covered by the brine.
- Use clean utensils whenever removing radishes from the jar.
- Use the pickled radishes within two weeks.
- Do not reuse brine that has already held vegetables for another batch.
- Discard the batch if you see mold, slime, unusual bubbling, unexpected pressure, or suspicious changes in color, texture, or odor.
- Do not use appearance or smell alone as proof that the food is safe.
- Do not water-bath can or pressure can this formula.
Get more seasonal recipes, quick toppings, and small-batch pickle ideas delivered to your inbox.
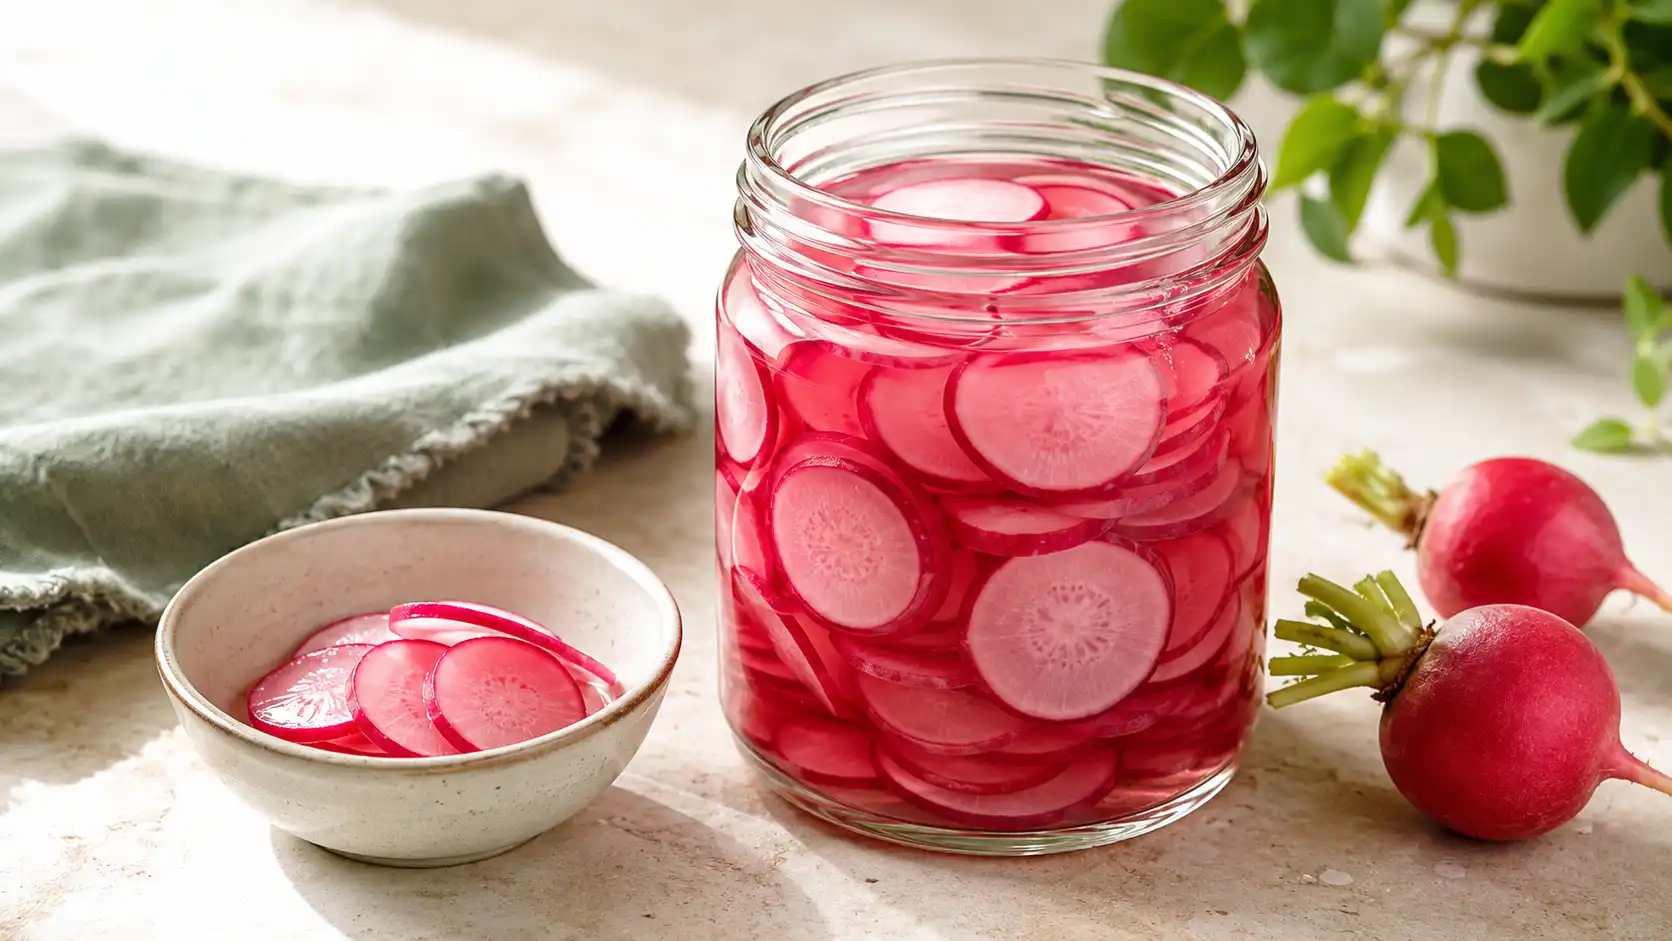
Quick Pickled Radishes
Ingredients
Equipment
Method
- Wash and sanitize a heat-safe 1-pint glass jar and its lid, then allow them to drain.
- Inspect and wash the radishes under running water. Remove the leafy tops and thin root ends, and discard any radishes that are soft, moldy, slimy, or badly damaged.
- Slice the radishes into uniform rounds approximately 1/8 inch thick. Use a mandoline hand guard when applicable.
- Place the mustard seeds and whole black peppercorns in the bottom of the jar. Add the optional garlic and crushed red pepper flakes when using them.
- Pack the sliced radishes into the jar without crushing them, leaving enough room for the brine to circulate.
- Combine the distilled white vinegar, water, granulated sugar, and pickling salt in a small nonreactive saucepan.
- Warm the brine over medium heat, stirring for 1 to 2 minutes until the sugar and salt dissolve. Do not boil it for an extended period.
- Carefully pour the warm brine over the radishes until all the slices are submerged. Discard any unused brine.
- Gently tap the jar or run a clean utensil around the inside edge to release trapped air bubbles. Make sure the radishes remain below the surface of the brine.
- Allow the jar to stand briefly until it is no longer steaming. Cover it and refrigerate promptly at 40°F (4°C) or below.
- Chill for at least 1 hour before tasting. For a more developed flavor, refrigerate for 4 to 24 hours before serving.
- Keep the jar covered and refrigerated, and use the pickled radishes within 2 weeks.
Notes
Frequently Asked Questions
How long do pickled radishes last in the refrigerator?
Use these pickled radishes within two weeks. Keep the jar covered at 40°F or below, keep the slices submerged in the brine, and remove servings with clean utensils.
How soon can you eat quick pickled radishes?
You can taste 1/8-inch radish slices after about one hour of refrigeration. For a more developed flavor, let them rest for 4 to 24 hours.
Why do pickled radishes sometimes smell strong?
Some batches develop a stronger version of the radishes’ naturally sharp aroma. Keep the jar tightly covered. Discard the batch when an off odor appears with mold, slime, pressure, unusual bubbles, or other suspicious changes. Smell alone cannot establish whether food is safe.
Can I make pickled radishes without sugar?
Sugar mainly balances the sharp vinegar and peppery radish flavors. Omitting it will produce a noticeably more acidic result. This specific version has not been formulated as a sugar-free recipe.
Can I can this pickled radish recipe?
No. This formula is intended only for refrigerator storage and does not include a validated water-bath processing method. Use a research-tested canning recipe when shelf-stable storage is required.
More Homemade Pickle Recipes
Explore the complete collection of homemade pickle recipes, or try one of these next: